User tasks are semi-manual activities in which an IT system works together with a human actor. I.e., a human actor gets or picks a task from a task list.
In PROCEED, one user task is designed in exactly one HTML page which can also
contain CSS. Therefore every user task is referencing a file with the attribute
proceed:fileName. (Every user task HTML page of one process are stored inside
the User-Tasks folder of the related process folder.) Multiple user tasks can
point to the same file, so they will reuse the same HTML page.
By default, every user task gets a task
constraint machine.outputs == Screen. This ensures that the selected Machine has a display to show the
tasklist. There are some cases where it makes sense that a Machine without a
display hosts a task list, e.g. if it is a server. In this case the constraint
can easily be removed via the graphical interface.
If the HTML page references an online resource, e.g. a picture hosted on the
internet, a second constraint needs to be added to ensure that the executing
Machine has Internet access. This is sometimes automatically recognized and
added (machine.online == true).
<userTask id="Task_0pjwckr" name="Erstelle Welle" implementation="https://html.spec.whatwg.org/" proceed:fileName="User_Task_0991eu7">
    <extensionElements>
        <proceed:milestones>
            <proceed:milestone>
                <proceed:id>m1</proceed:id>
                <proceed:name>Milestone 1</proceed:name>
                <proceed:description>First goal achieved</proceed:description>
            </proceed:milestone>
            <proceed:milestone>
                <proceed:id>m2</proceed:id>
                <proceed:name>Milestone 2</proceed:name>
                <proceed:description>Second goal achieved</proceed:description>
            </proceed:milestone>
        </proceed:milestones>
        <proceed:processConstraints>
            <proceed:hardConstraints>
                <proceed:hardConstraint>
                <proceed:name>machine.outputs</proceed:name>
                <proceed:condition>==</proceed:condition>
                <proceed:values>
                    <proceed:value>Screen</proceed:value>
                </proceed:values>
                </proceed:hardConstraint>
                <proceed:hardConstraint>
                <proceed:name>machine.online</proceed:name>
                <proceed:condition>==</proceed:condition>
                <proceed:values>
                    <proceed:value>true</proceed:value>
                </proceed:values>
                </proceed:hardConstraint>
            </proceed:hardConstraints>
        </proceed:processConstraints>
    </extensionElements>
</userTask>
Milestones
Milestones indicate the progress to reach a certain goal. They are added to the
BPMN process with <milestones>,<milestone>,<id>,<name>
and<description> elements like shown in the example above. Adding the element
in the BPMN XML is more for documentation. They actually also need to be added
to the HTML, which is responsible for setting and sending the progress back to
the Engine. If added via the GUI of PROCEEDs Management System, the milestones
are automatically added to the XML and HTML. Example of the generated HTML:
<div class="if91m milestones-wrapper">
  <p>Update your Milestones:
  </p>
  <div>
    <label>
      Milestone ID: m1 | Name: mm1 | Description: mmm1
      <input type="range" min="0" max="100" value="0" oninput="this.nextElementSibling.value = this.value + '%'" class="milestone-m1"/>
      <output name="fulfillment_m1">0%</output>
    </label>
  </div>
  <div>
    <label>
      Milestone ID: m2 | Name: mm2 | Description: mmm2
      <input type="range" min="0" max="100" value="0" oninput="this.nextElementSibling.value = this.value + '%'" class="milestone-m2"/>
      <output name="fulfillment_m2">0%</output>
    </label>
  </div>
</div>
The Tasklist website of the PROCEED Engine contains listeners which register any change to any input fields, fetch the values and send them to the Engine.
User Assignment
User tasks are assigned to a resource which works on the task. This is typically a user or a role.
This is currently not yet implemented and in development.
<userTask id="Task_0pjwckr" name="Erstelle Welle" implementation="https://html.spec.whatwg.org/" proceed:fileName="User_Task_0991eu7">
    <extensionElements>
        <proceed:processConstraints>
            <proceed:hardConstraints>
                <proceed:constraintGroup id="cg-0v1gzu0" conjunction="OR">
                    <proceed:hardConstraint>
                      <proceed:name>user.role</proceed:name>
                      <proceed:condition>==</proceed:condition>
                      <proceed:values conjunction="OR">
                        <proceed:value>Admin</proceed:value>
                      </proceed:values>
                    </proceed:hardConstraint>
                    <proceed:hardConstraint>
                      <proceed:name>user.role</proceed:name>
                      <proceed:condition>==</proceed:condition>
                      <proceed:values conjunction="OR">
                        <proceed:value>Manager</proceed:value>
                      </proceed:values>
                    </proceed:hardConstraint>
                    <proceed:hardConstraint>
                      <proceed:name>user.name</proceed:name>
                      <proceed:condition>==</proceed:condition>
                      <proceed:values conjunction="OR">
                        <proceed:value>Max Mustermann</proceed:value>
                      </proceed:values>
                    </proceed:hardConstraint>
                    <proceed:hardConstraint>
                      <proceed:name>user.id</proceed:name>
                      <proceed:condition>==</proceed:condition>
                      <proceed:values conjunction="OR">
                        <proceed:value>123</proceed:value>
                        <proceed:value>234</proceed:value>
                        <proceed:value>321</proceed:value>
                      </proceed:values>
                    </proceed:hardConstraint>
                </proceed:constraintGroup>
            </proceed:hardConstraints>
        </proceed:processConstraints>
    </extensionElements>
</userTask>
Access to variables
Within an User Task it is possible to retrieve and set variables of the processinstance. This requires certain changes inside the HTML Code of the User Task.
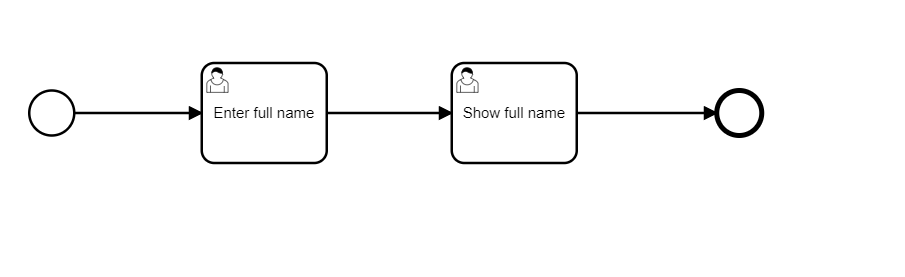
Given this BPMN-process, the User Tasks will interact with the variables by first entering a user’s full name. The set variables can then be retrieved to be shown in the next User Task.
Set variables
User input can be used to set variables. Setting process variables is done like
in a normal form. You can use every usual form element. Typically this is done
with <input type="..." name="variableName" value="initialValue" ...> where
name is the name of the process variable and value the
inserted/changed/default value in the input field.
In this example, the variables firstname and surname are set by the Users
input
<form class="form">
  <div id="i3jcu">
  <b id="i4m1">Enter full name
  </b>
  </div>
  <img id="inmmd" src="https://cdn.pixabay.com/photo/2015/07/02/10/40/writing-828911_1280.jpg"/>
  <div id="if91m">Welcome to this User Task! Enter your full name and submit to complete this task.
  </div>
  <label>
  First Name: <input type="text" name="firstname" required minlength="1" placeholder="First name"/>
  </label>
  <br/>
  <label>
  Surname: <input type="text" name="surname" required minlength="1" placeholder="Surname"/>
  </label>
  <br/>
  <button type="submit" class="button">Submit</button>
</form>
This is what is shown in the tasklist of the engine when encountering the User
Task Enter full name: 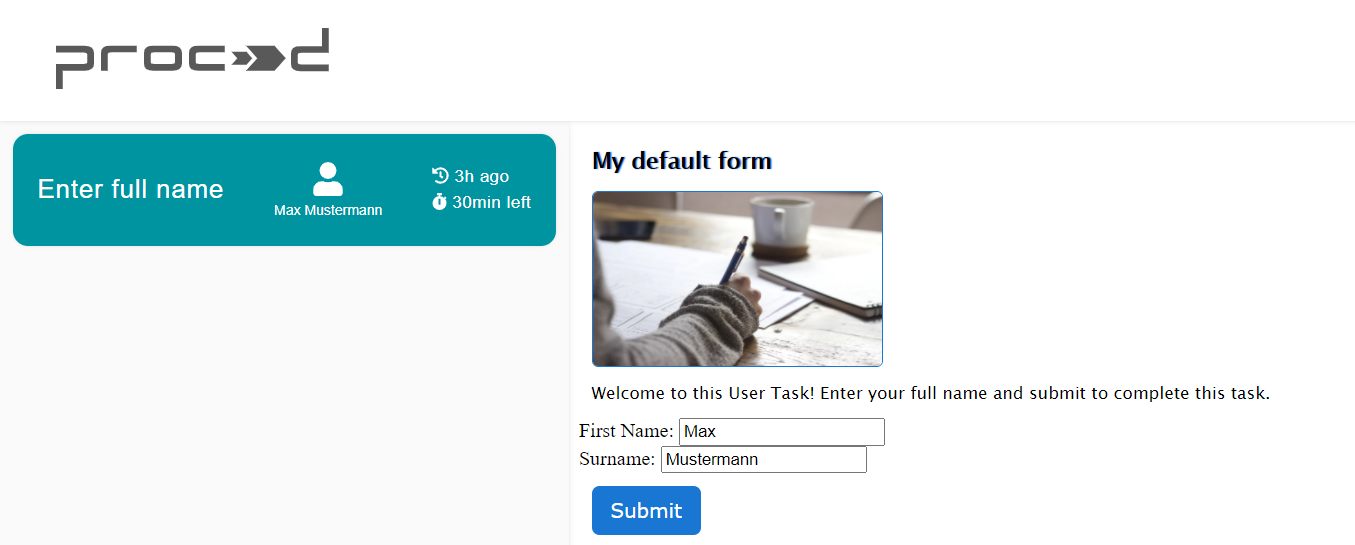
Retrieve variables
Existing variables of the processInstance can be retrieved to be shown inside the User Task.
For this, the HTML Code of the User Task must make use of placeholders to access and use process variables. It is easy and keeps templates readable by limiting tags to variables and statements (“for” and “if”).
Usually you only need {%[variable-name]%} for accessing the desired variable.
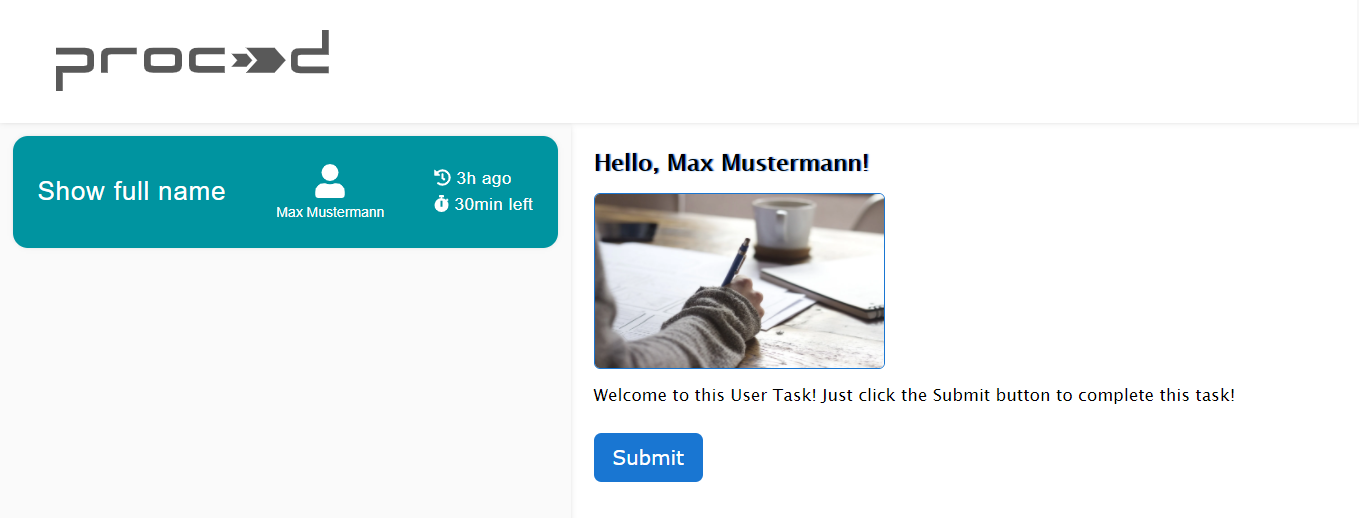
In this example, the variables firstname and surname are shown inside this
User Task
<form class="form">
  <div id="i3jcu">
  <b id="i4m1">Hello, {%firstname%} {%surname%}!
  </b>
  </div>
  <img id="inmmd" src="https://cdn.pixabay.com/photo/2015/07/02/10/40/writing-828911_1280.jpg"/>
  <div id="if91m">Welcome to this User Task! Just click the Submit button to complete this task!
  </div>
  <button type="submit" class="button">Submit</button>
</form>
This is what is shown in the tasklist of the engine when encountering the User Task Show full name:
For more complex object types variables of the form { [attribute-name]: [attribute-value], ... } subscripts can be used to access nested values.
To do that use a placeholder of the form:
{%[variable-name].[attribute-name]%}
In this example the entry name of the variable user which has the value { name: 'Max Mustermann' } is shown inside the user task.
The ouput is the same as for the previous example.
<form class="form">
  <div id="i3jcu">
  <b id="i4m1">Hello, {%user.name%}!
  </b>
  </div>
  <img id="inmmd" src="https://cdn.pixabay.com/photo/2015/07/02/10/40/writing-828911_1280.jpg"/>
  <div id="if91m">Welcome to this User Task! Just click the Submit button to complete this task!
  </div>
  <button type="submit" class="button">Submit</button>
</form>
For more complex cases if and for statements are supported.
If part of the html should only be shown when a specific variable is true or has a value you can use if statements of the form:
{%if [variable-name]%}[conditional-part]{%/if%}
You can also use comparisons to show parts of the html only if a variable has (or does not have) a specific value:
{%if [variable-name] == '[string-value]'%}[conditional-part]{%/if%}
{%if [variable-name] != '[string-value]'%}[conditional-part]{%/if%}
In this example the text Hello Max! is shown when the variable firstname has the value Max.
Otherwise the text Welcome is shown.
<form class="form">
  <div id="i3jcu">
    {%if firstname == 'Max'%}Hello Max!{%/if%}
    {%if firstname != 'Max'%}Welcome{%/if%}
  </div>
  <button type="submit" class="button">Submit</button>
</form>
This is what will be the output html when the value of firstname is Max.
<form class="form">
  <div id="i3jcu">
    Hello Max!
  </div>
  <button type="submit" class="button">Submit</button>
</form>
If a part of the html should shown for every entry in an array typed variable you can use a for statement of the form:
{%for [loop-variable] in [variable-name]%}[html part]{%/for%}
Inside the loop you can then use loop-variable to access the values of the entry.
In this example the variable users has the following value:
[
  { firstname: 'Max', surname: 'Mustermann' },
  { firstname: 'John', surname: 'Doe' }
]
The given html is:
<form class="form">
  <ul>
    {%for user in users%}
      <li>{%user.firstname%} {%user.surname%}</li>
    {%/for%}
  </ul>
  <button type="submit" class="button">Submit</button>
</form>
The resulting html is:
<form class="form">
  <ul>
    <li>Max Mustermann</li>
    <li>John Doe</li>
  </ul>
  <button type="submit" class="button">Submit</button>
</form>