Create a small process
In this tutorial, we will create a simple process which will cover the following concepts:
- Creating a new folder and process in the editor table
- Becoming familiar with the UI of the editor
- Designing a BPMN-based process and adding some meta information
Getting started
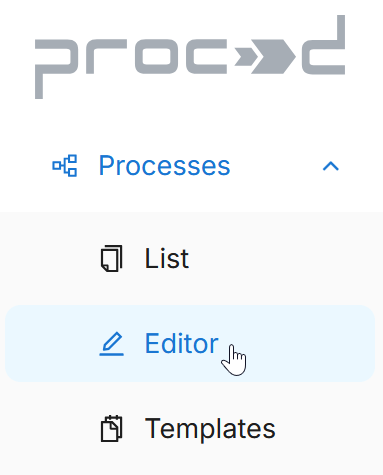
Start by opening the Processes menu in the left section to navigate to the editor.
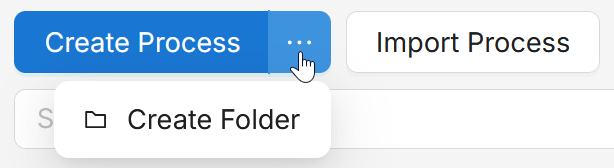
Click on the three-dotted button next to Create Process to create a new folder.
Give the folder a name and a description in the popup menu.
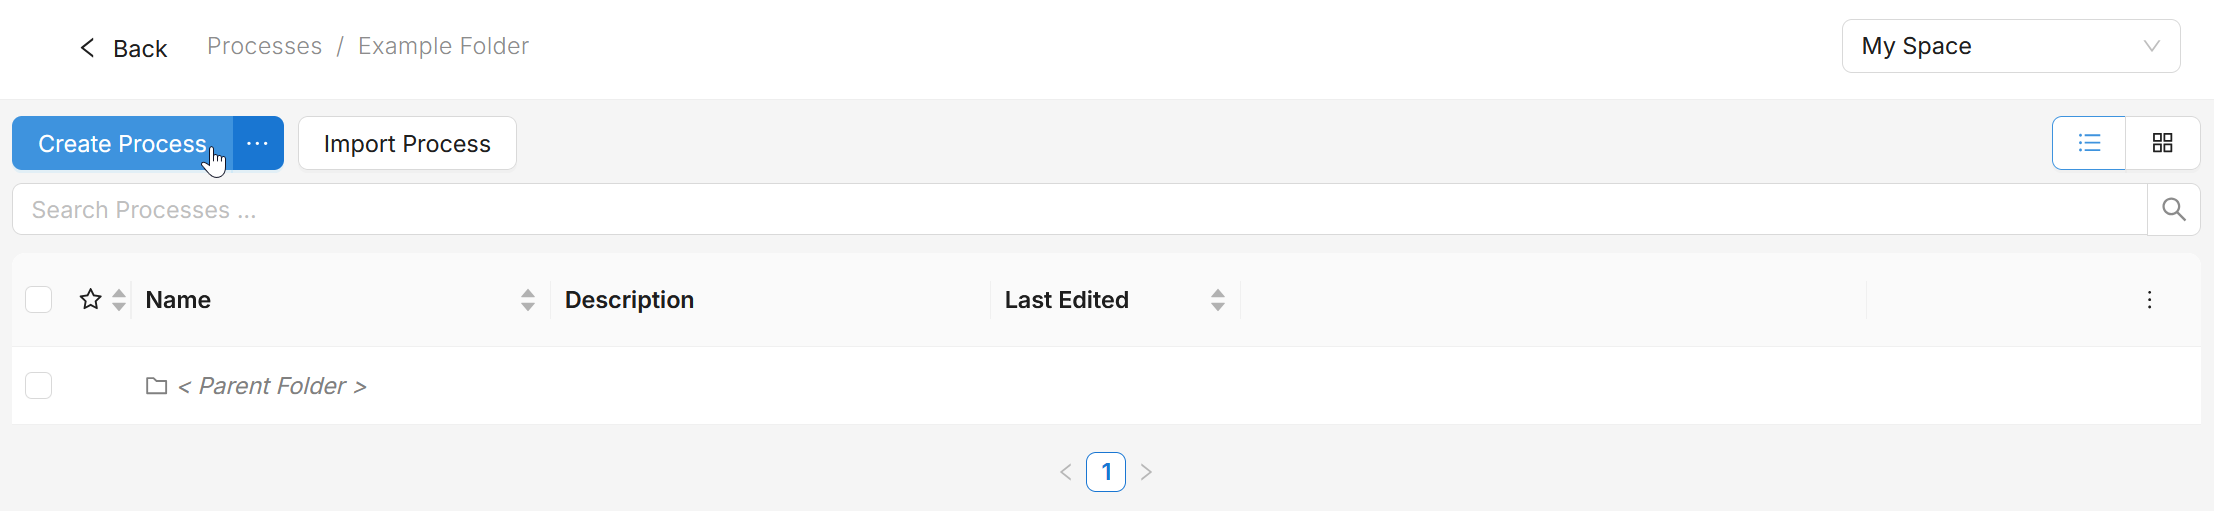
Press Create Process to create a new process inside your new folder. For our
example process we will build a simplified workflow of an order fulfillment
in a company, so name the process Order Fulfillment.
After creating the process you are now in the editor, so let’s have a quick look at the editor UI.
For keyboard shortcuts, refer to our section for them on this site.
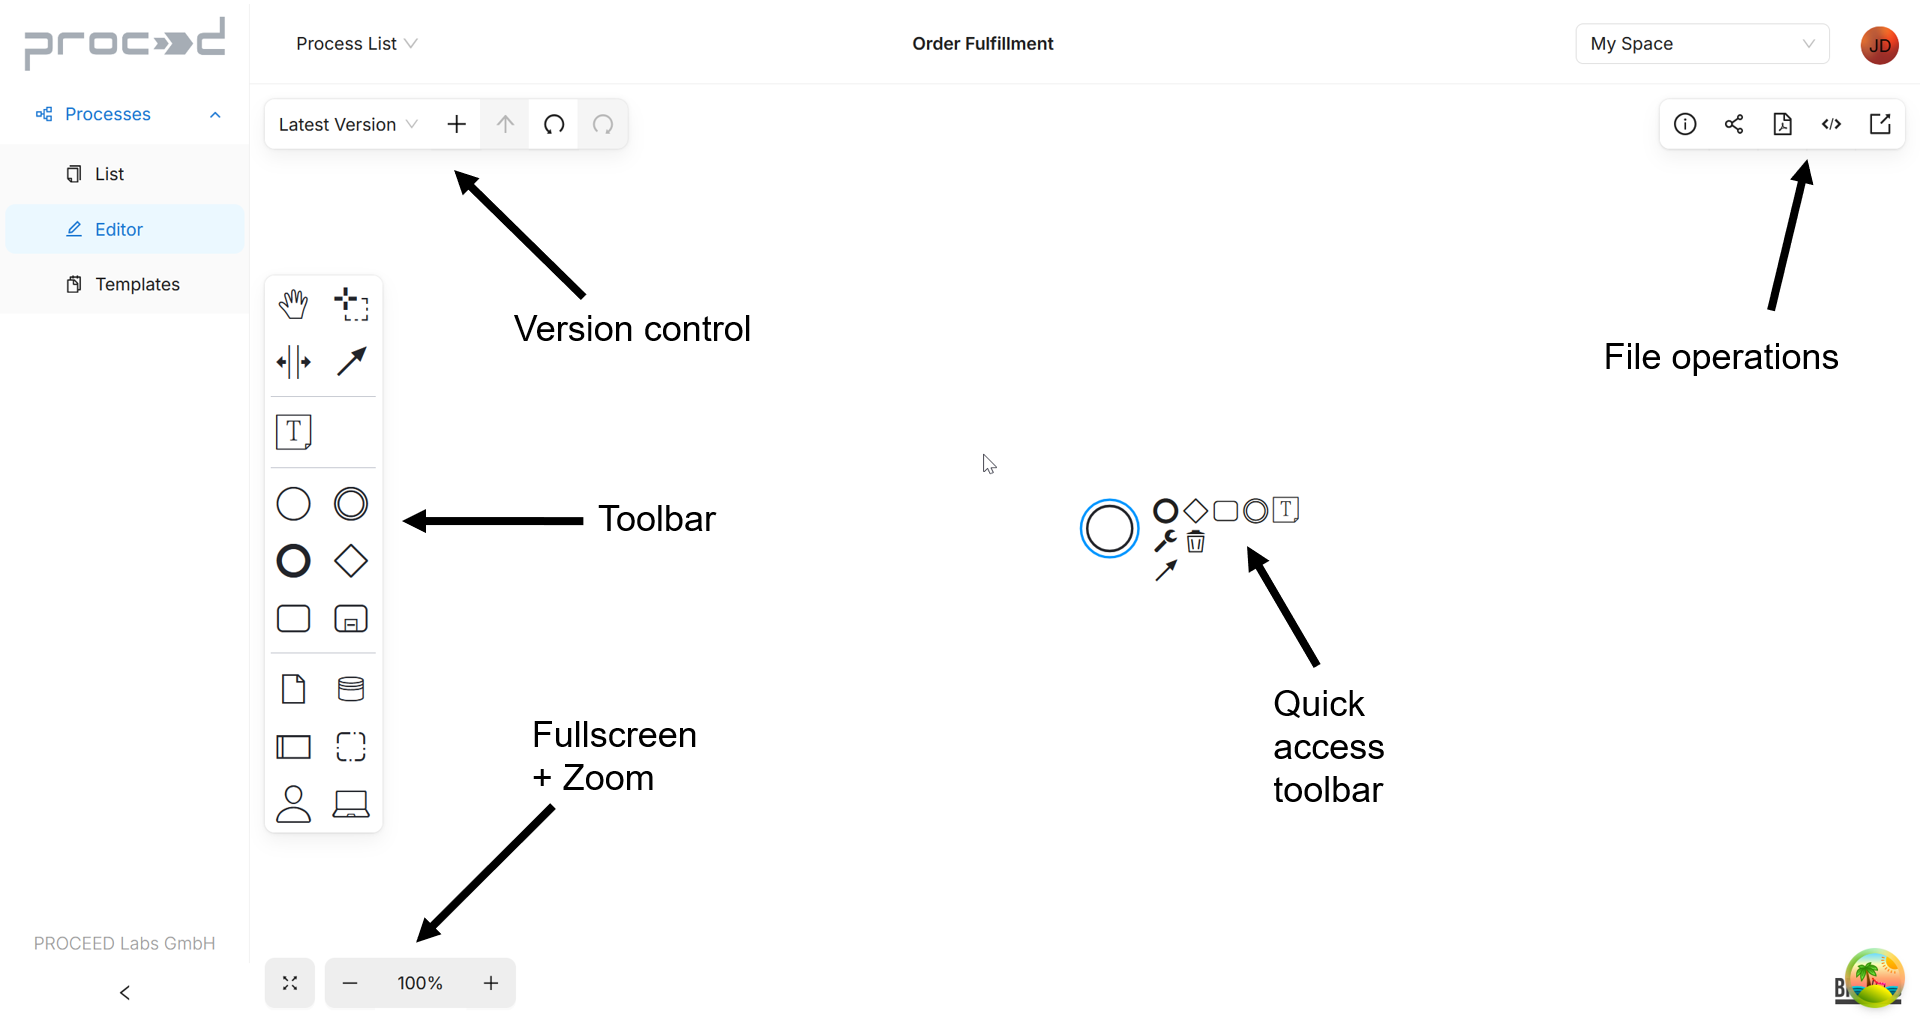
Basic Editor Functions
Every process begins with a start event, so your newly created process already contains one by default.
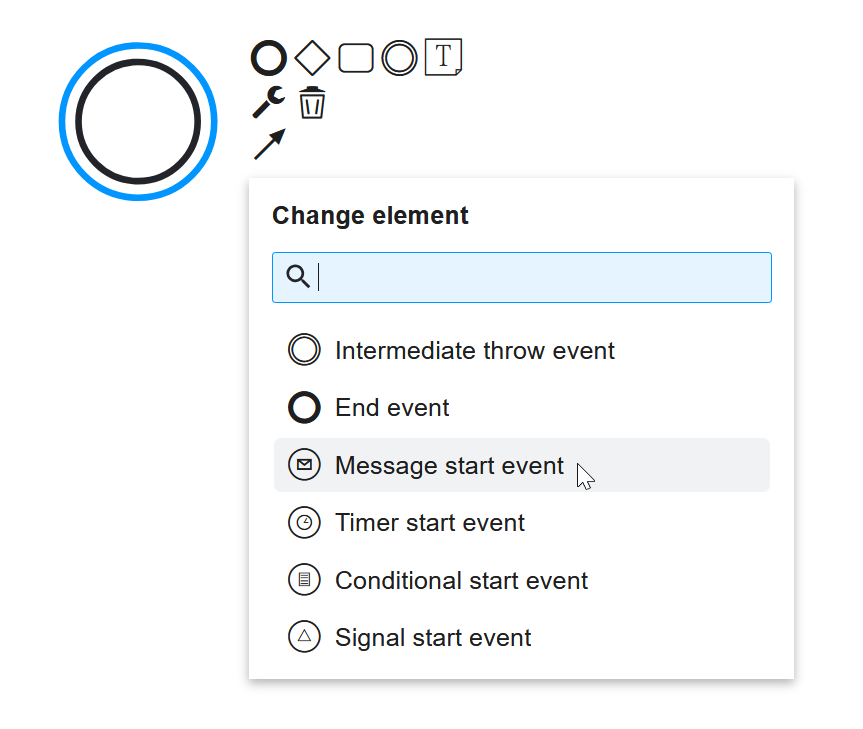
Click on the start event element to reveal the quick access toolbar.
Here you find the wrench icon which lets you change between different element types.
Our example case begins with receiving an order from a customer, so change the element to a message start event.
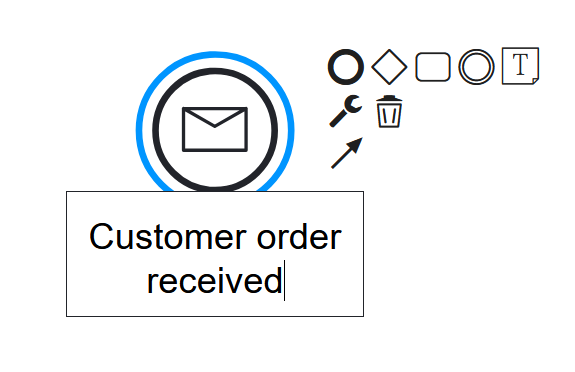
Double-clicking the element lets you name it in a small text-box which is also movable for readability.
Name your message start event something like Customer order received.
Tip: Shift-Enter completes the editing inside the text-box.
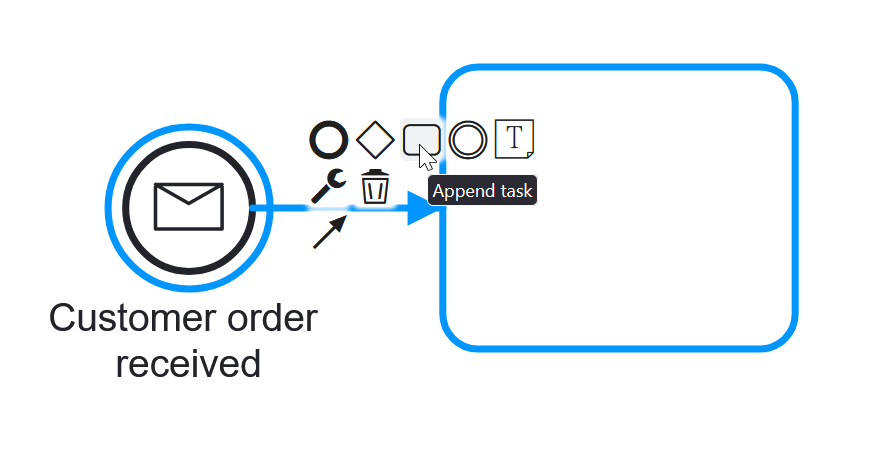
Clicking on your start event again, you will find the Append Task option to quickly connect a new task
with your event. Name the new task by double-clicking again, something like Check availability of components.
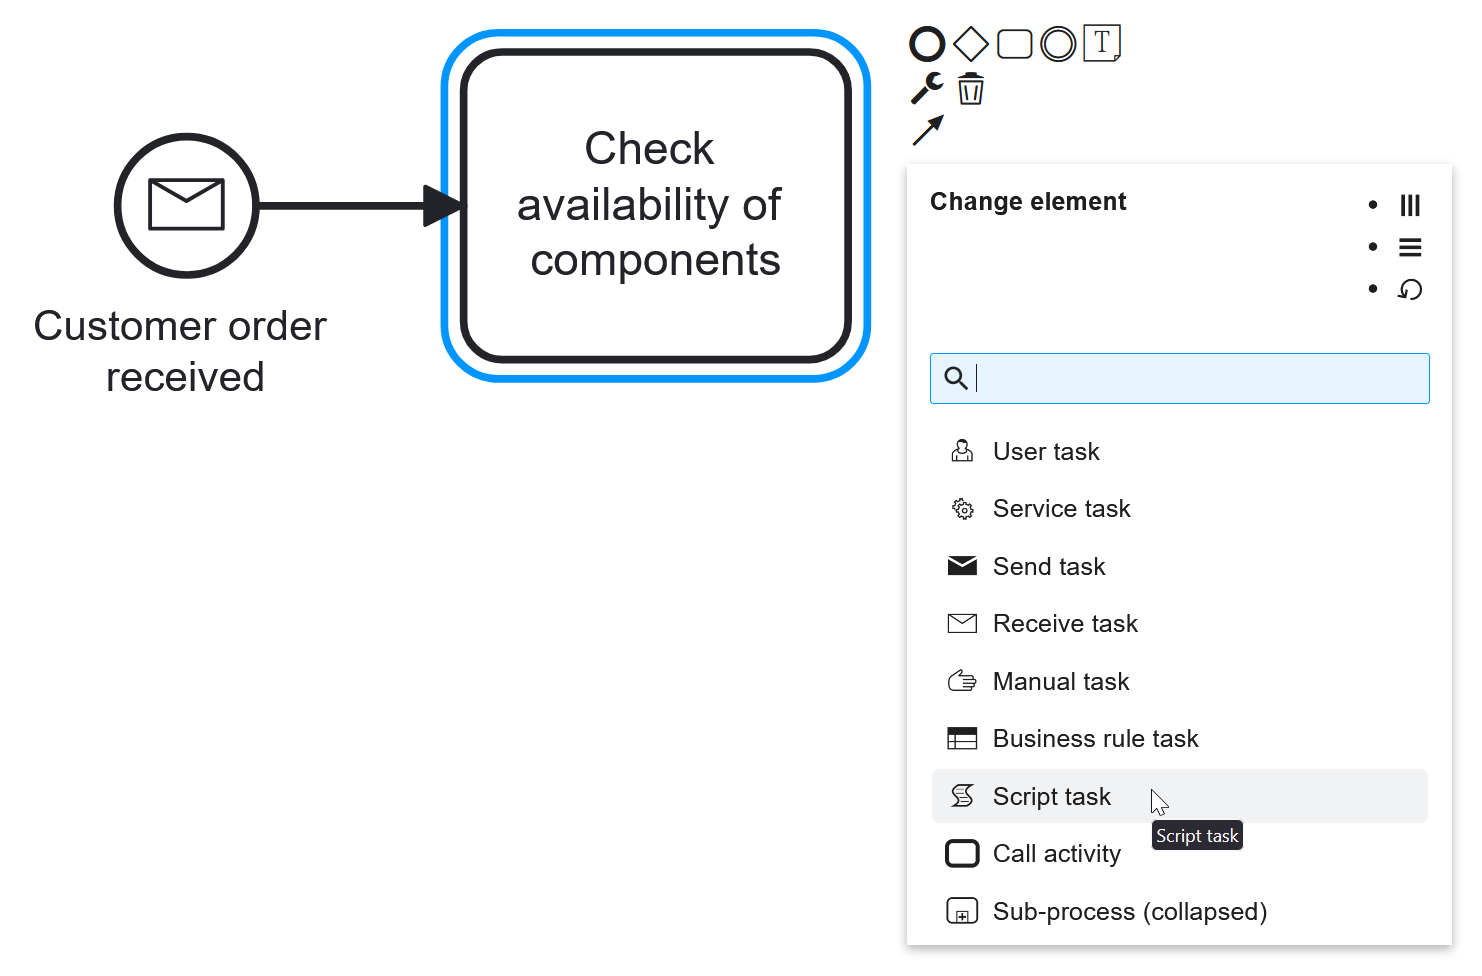
Tasks are also modifiable, so you can change your new task to a different kind using the wrench icon again.
In this case a script task would make sense to check for availability in a database.
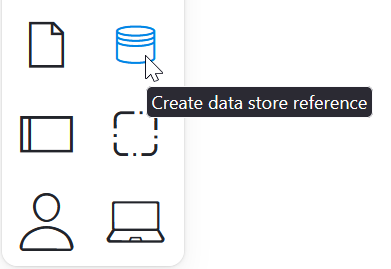
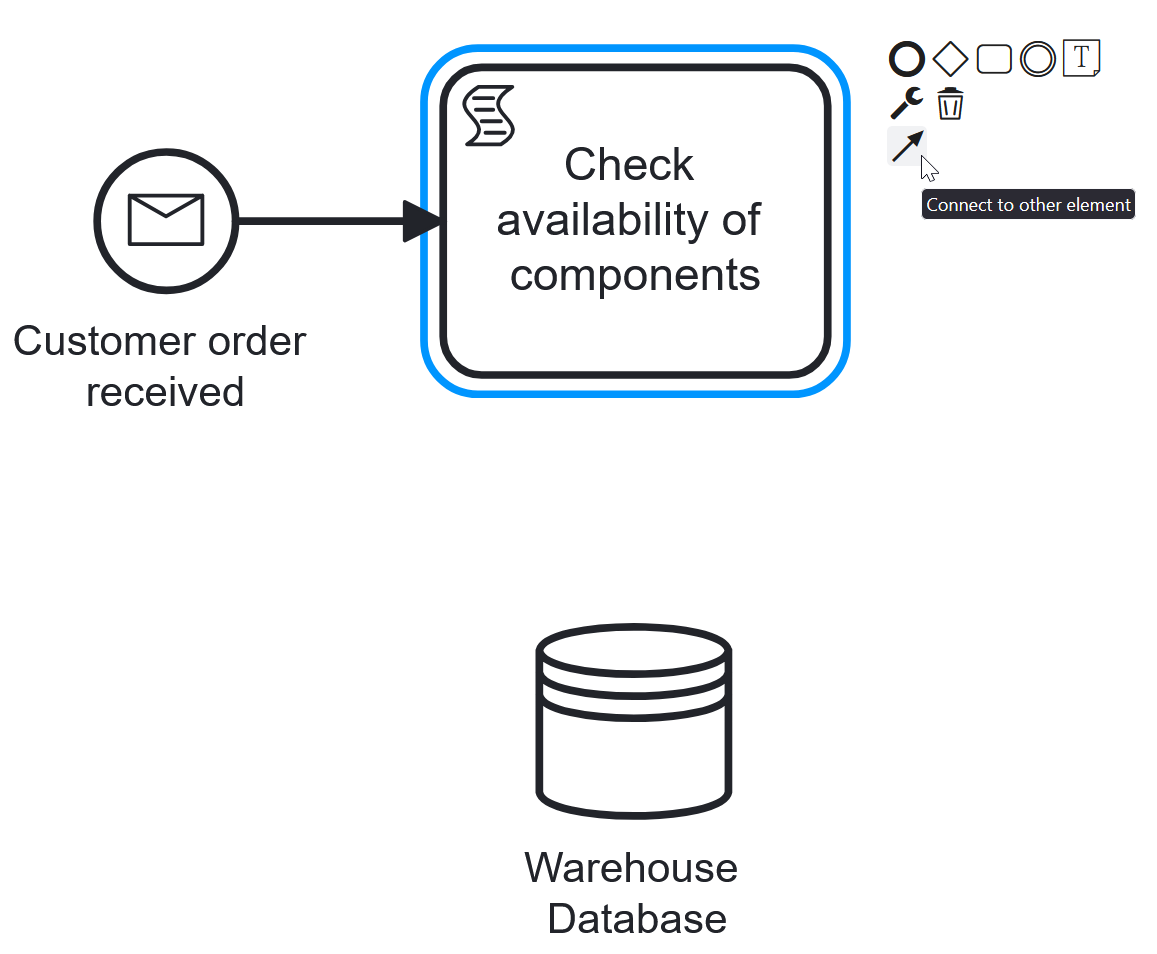
Some elements are only found in the toolbar on the left side. To check for availability of components,
we will reference a warehouse database, so you can drag-and-drop the data store element underneath your task
and name it Warehouse Database.
To connect elements, simply click on the element you want the connection to root from and use the arrow icon
in the quick access toolbar to draw a connection to another element, in this case from the task to the database.
Gateways
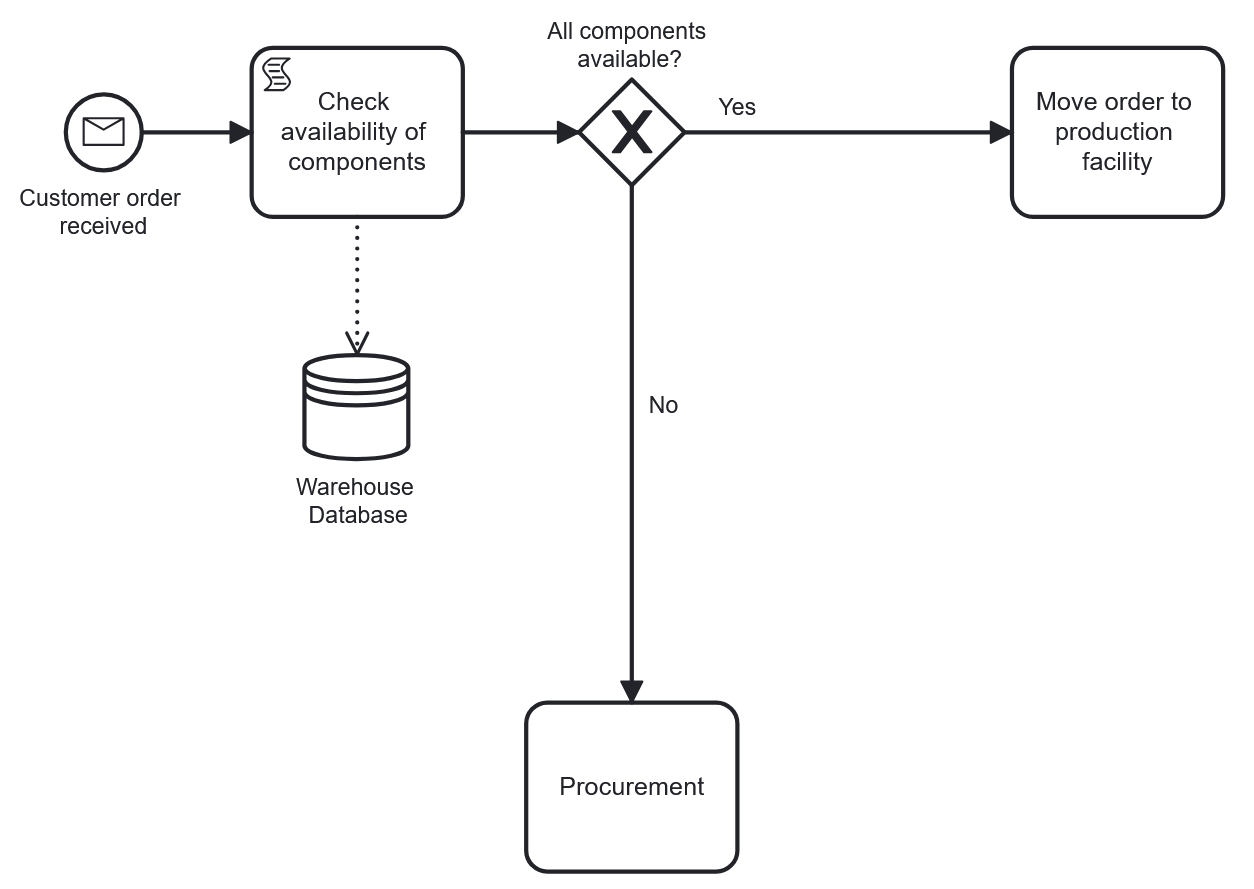
Let’s add some logic to our process! Use the Append gateway button from the toolbar to quickly connect a new gateway.
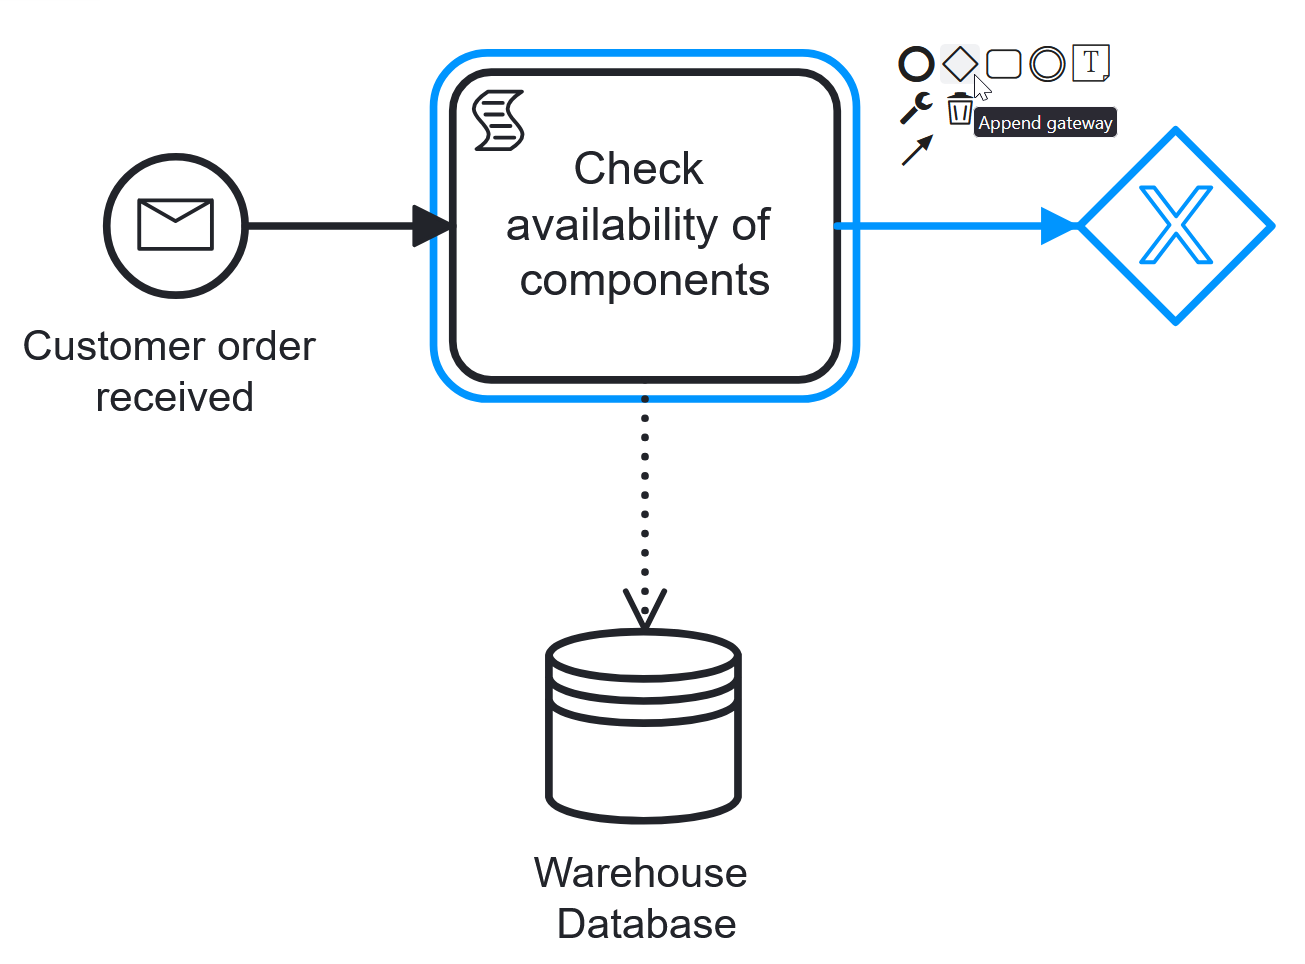
Gateways offer a way to model different process flows. The default gateway in the editor is an XOR gateway,
marked with an X inside, meaning the process can only follow one path going out from this element.
Name the gateway All components available?, append a task and double-click the connecting arrow to name it Yes.
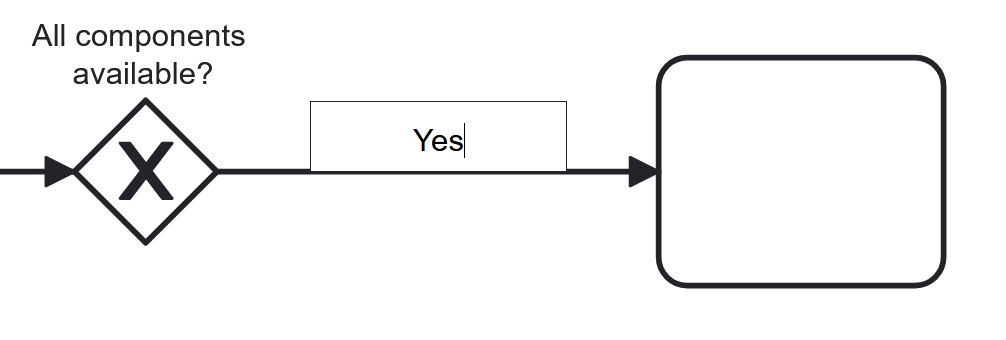
Name the appended task Move order to production facility. For conciseness, from now on in this guide we will only change
task types if it is necessary for the logic of the process. Continue by appending another task to the gateway,
naming it Procurement and the connection No as shown below.
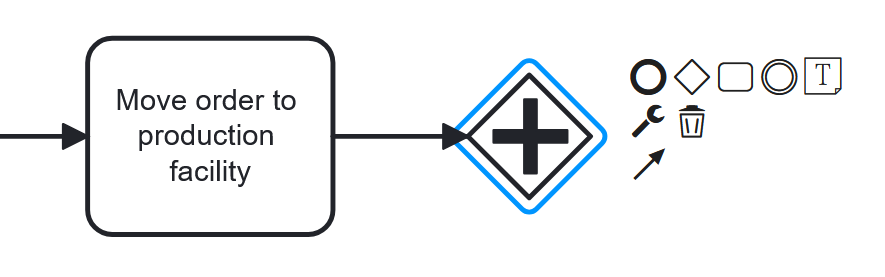
Another type of gate is a parallel gate, allowing for multiple tasks to run at the same time. It is indicated by a + sign.
Add another gate to the business rule task and change it into a parallel gate using the wrench icon.
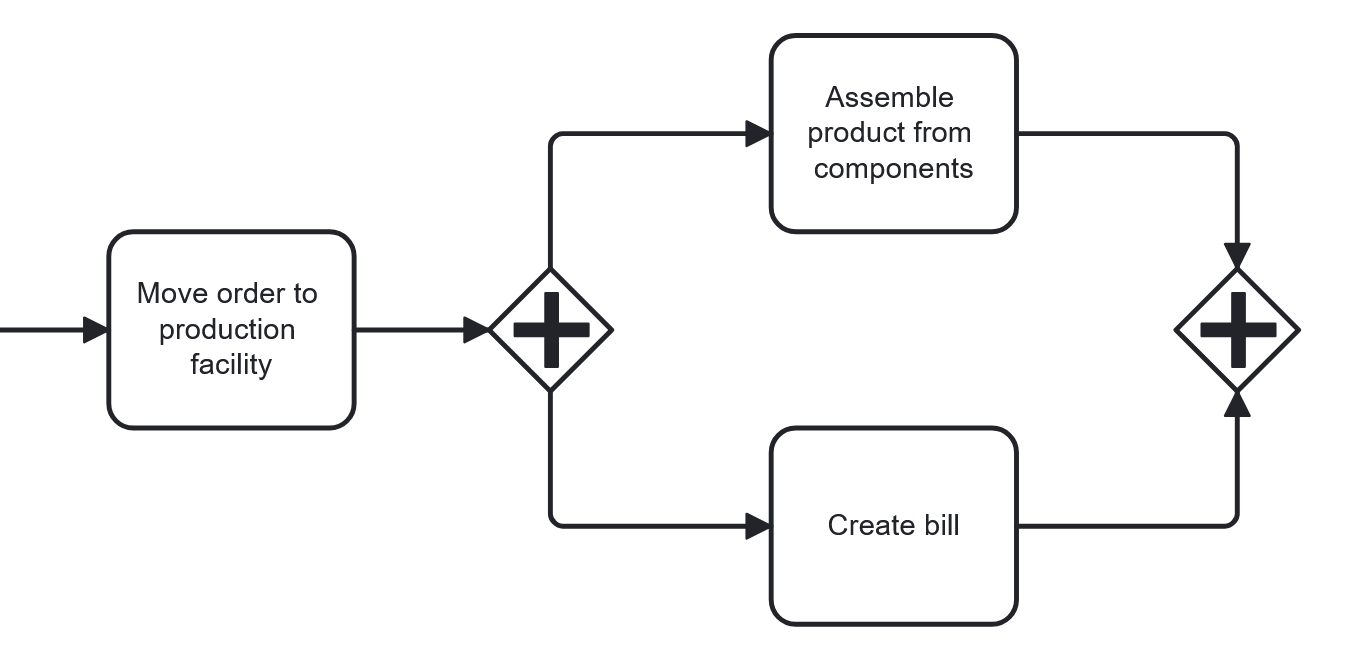
The individual paths of a parallel gate usually re-unite in another parallel gate. Append the tasks and the gate as shown
below.
Properties Panel + Meta Information
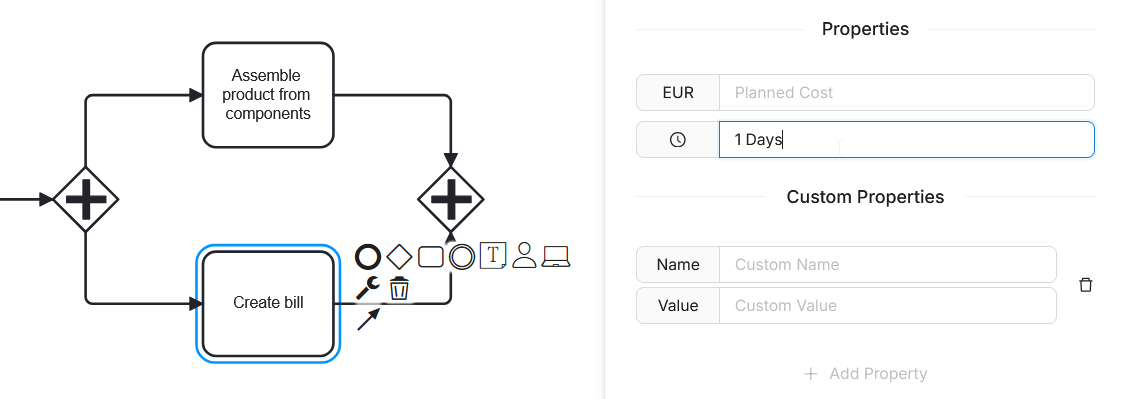
To modify elements beyond their type and add meta information further modifications can be made using the Properties Panel.
If no element is selected, the properties added are for the entire process, otherwise for the currently selected element.
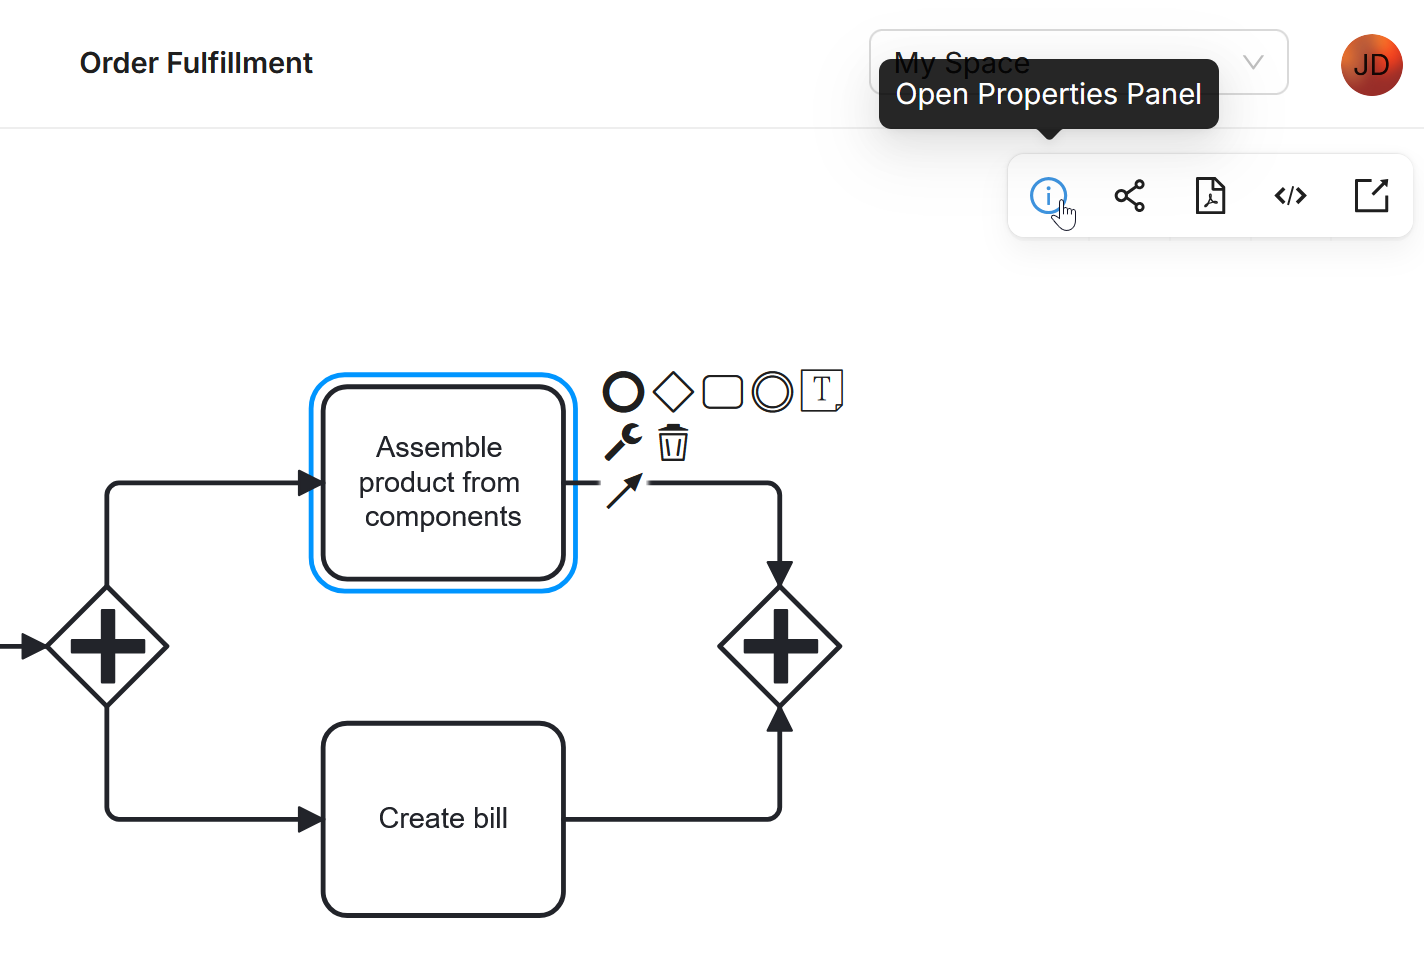
Select the Assemble task and open the panel, either clicking the icon
in the top right or use Ctrl or ⌘ + Enter
In the Properties Panel you find a lot of options to add further data to each element or change their appearance for
easier legibility. Use the pre-made duration property for example to give the Create bill task a custom duration in the popup menu.
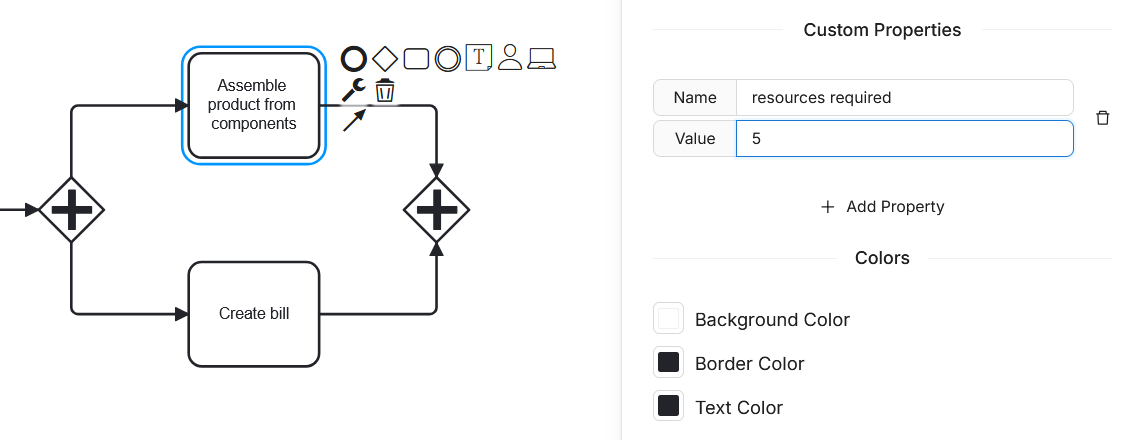
You also have the option of introducing your own custom properties with their own custom values.
For example, select the Assemble product element, enter a property name like resources required and give it a value.
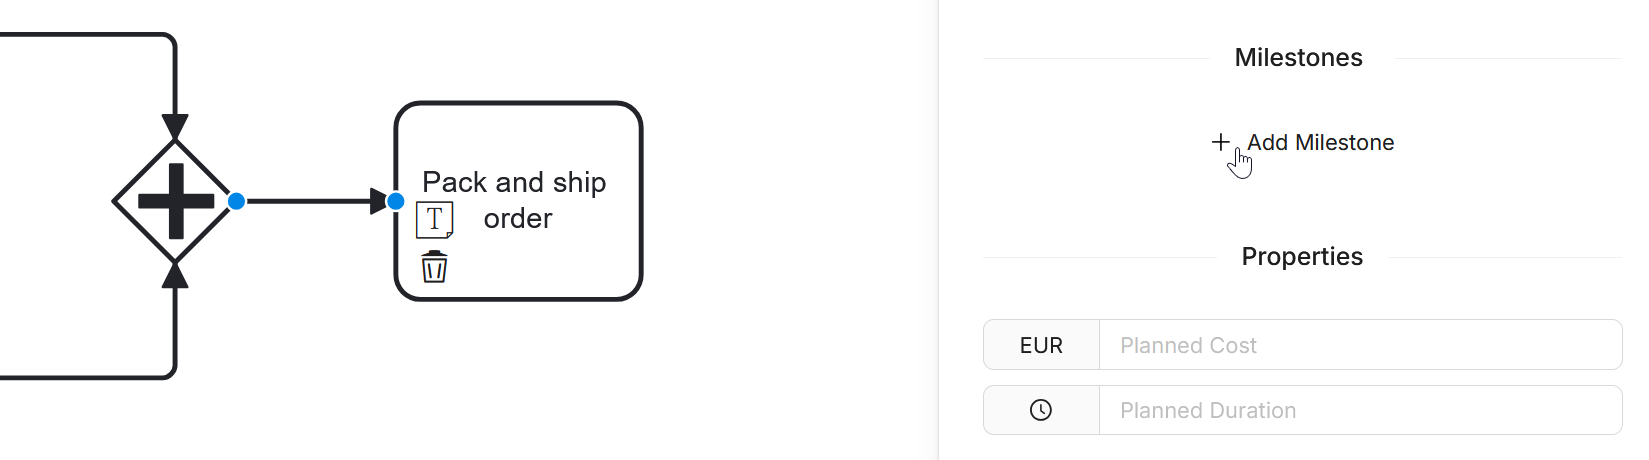
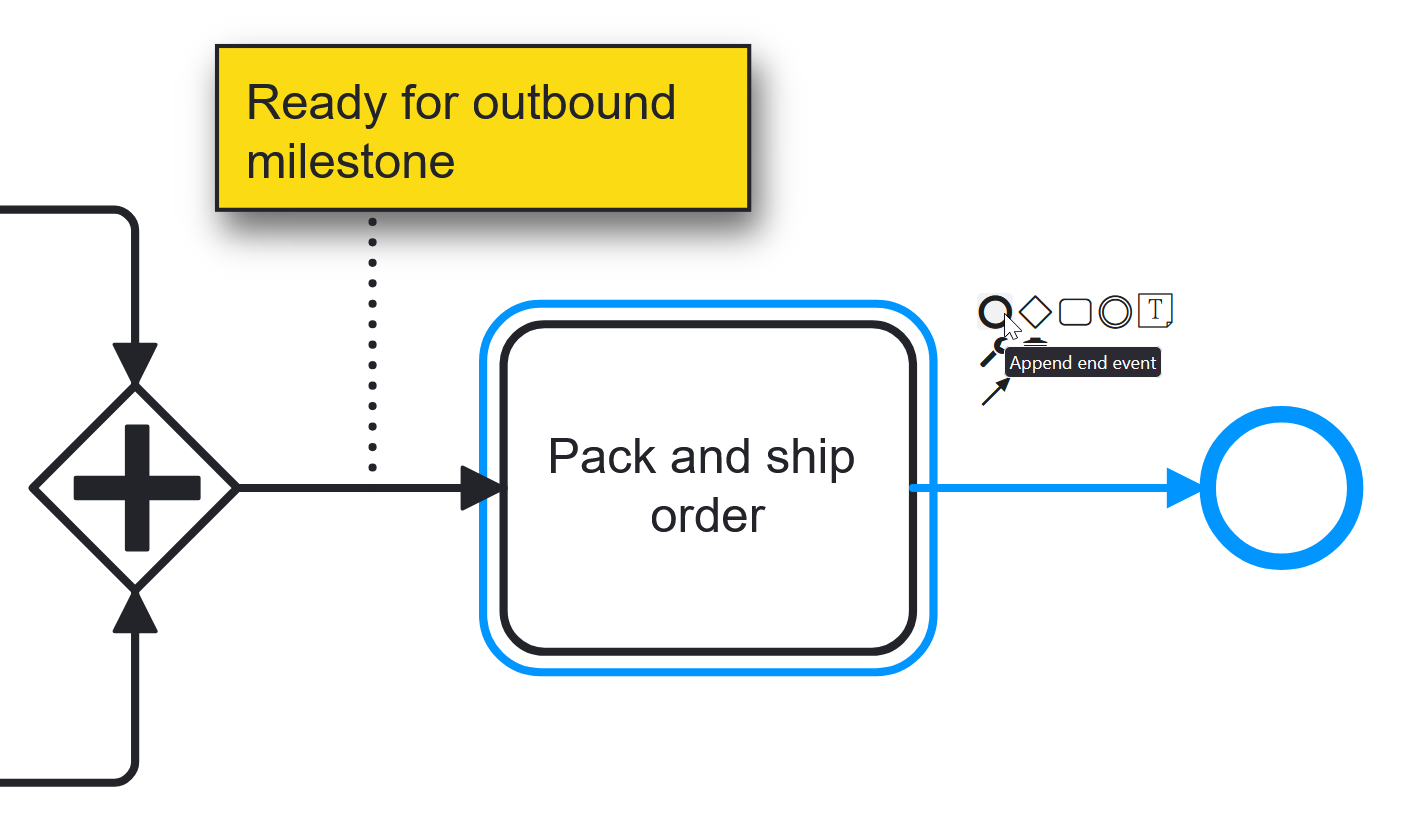
Another feature in the Properties Panel are Milestones. As the name implies, these are typically used to indicate progress
within a process. Append a task to the closing parallel gate as shown below, select the connecting line and add a milestone.
In the popup window, give the milestone an ID, a name and a description.
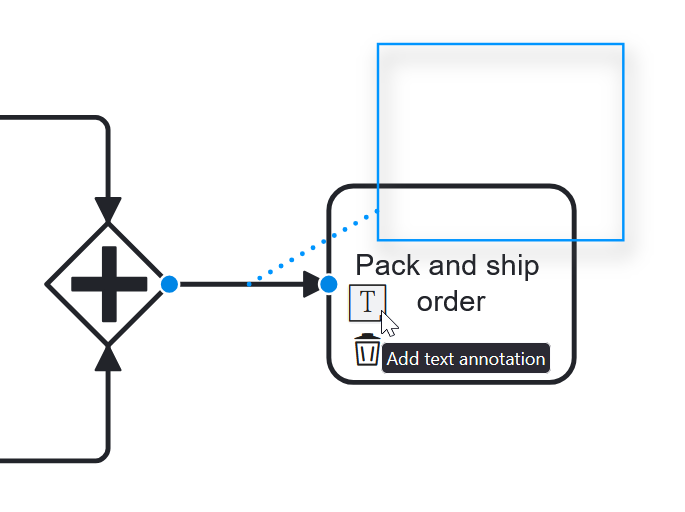
It should be indicated where a milestone can be reached in the process model. Use the Add text annotation button to append
a text field to the connection line that triggers the milestone. For better legibility, feel free to color the text field as well.
Each flow direction of the process has to end in an end event. Append one and call it Order fulfilled to complete this
side of the XOR gateway.
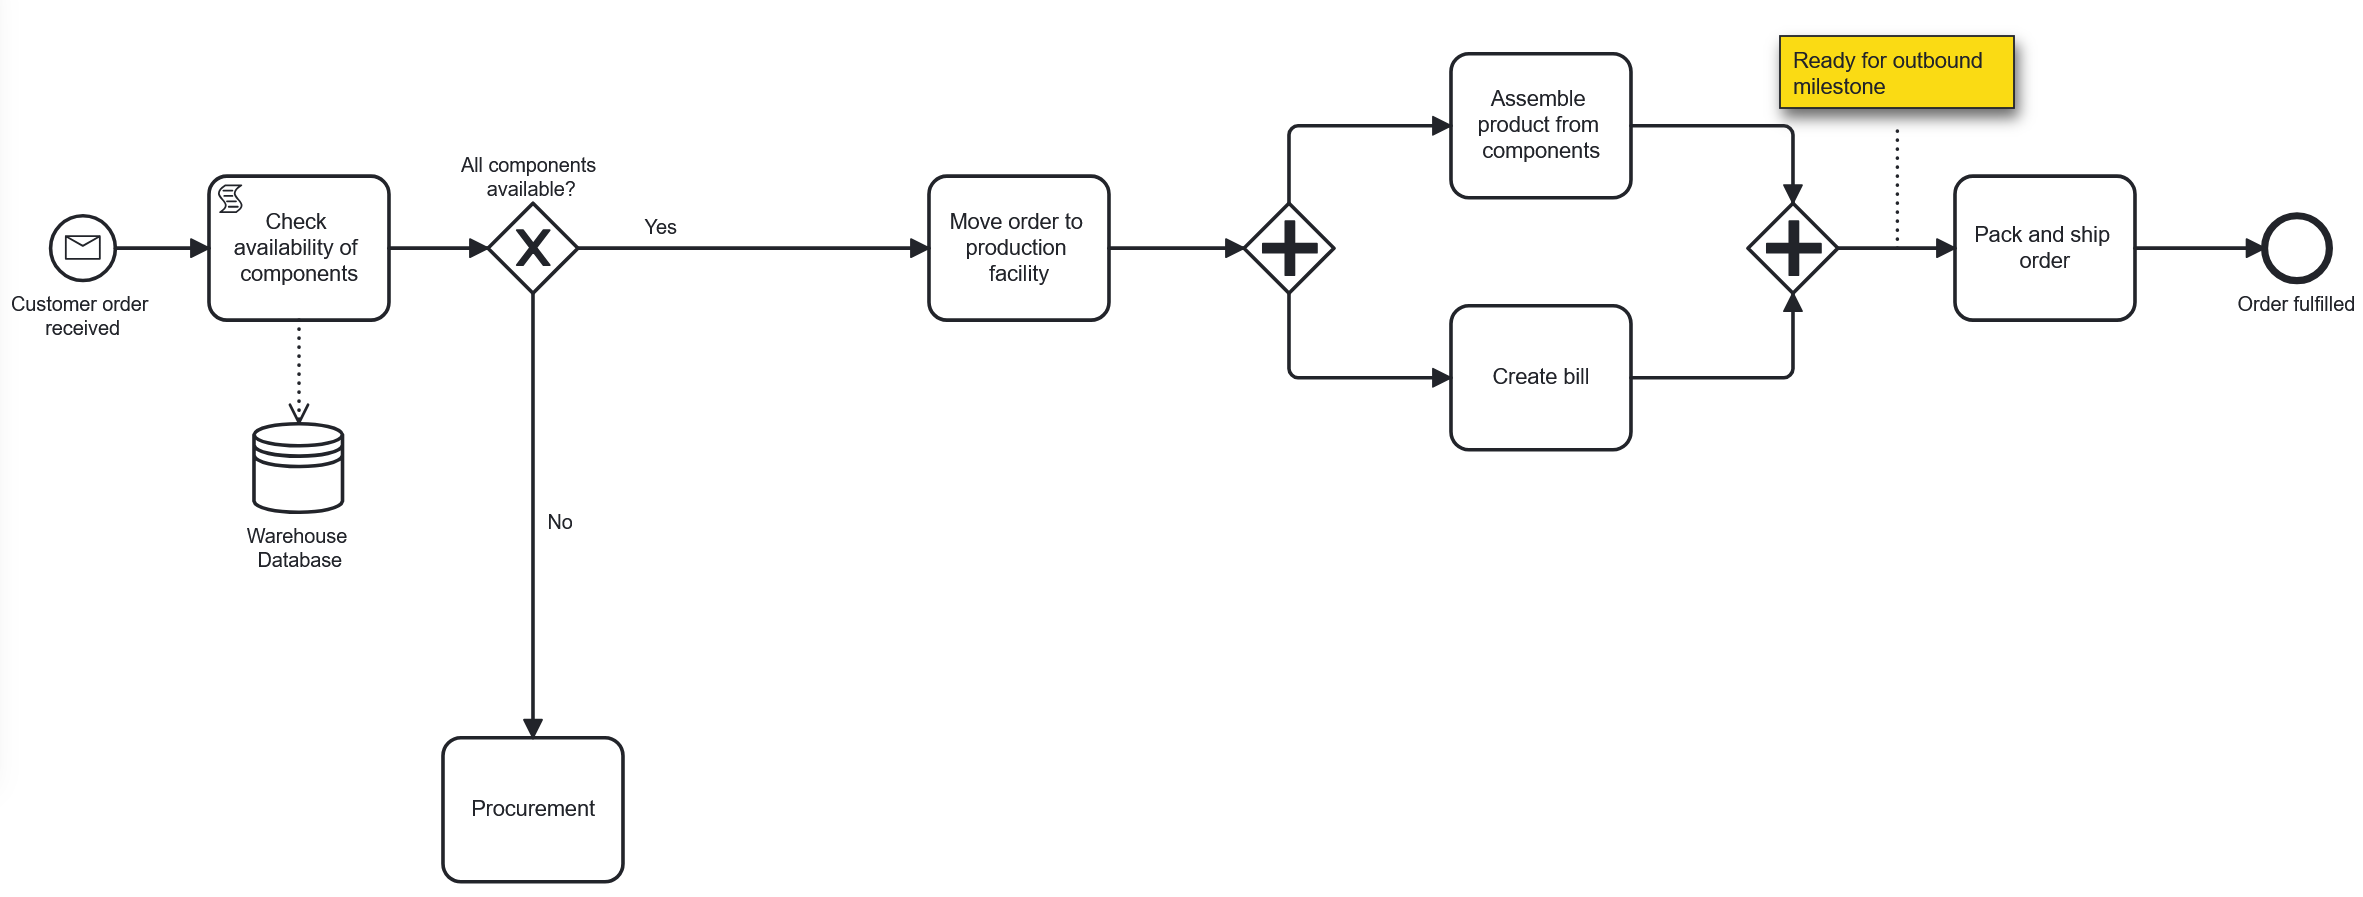
Before we finish this tutorial by completing the No side of the gateway, you can compare your current result to this
interim result below. Use the lasso and space removal tools from the left-side toolbar to refactor your model to
be similar to this, especially moving Procurement further down and giving the Yes arrow some extra space,
to make the next few steps a bit smoother.
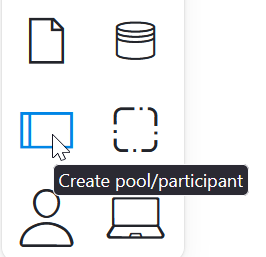
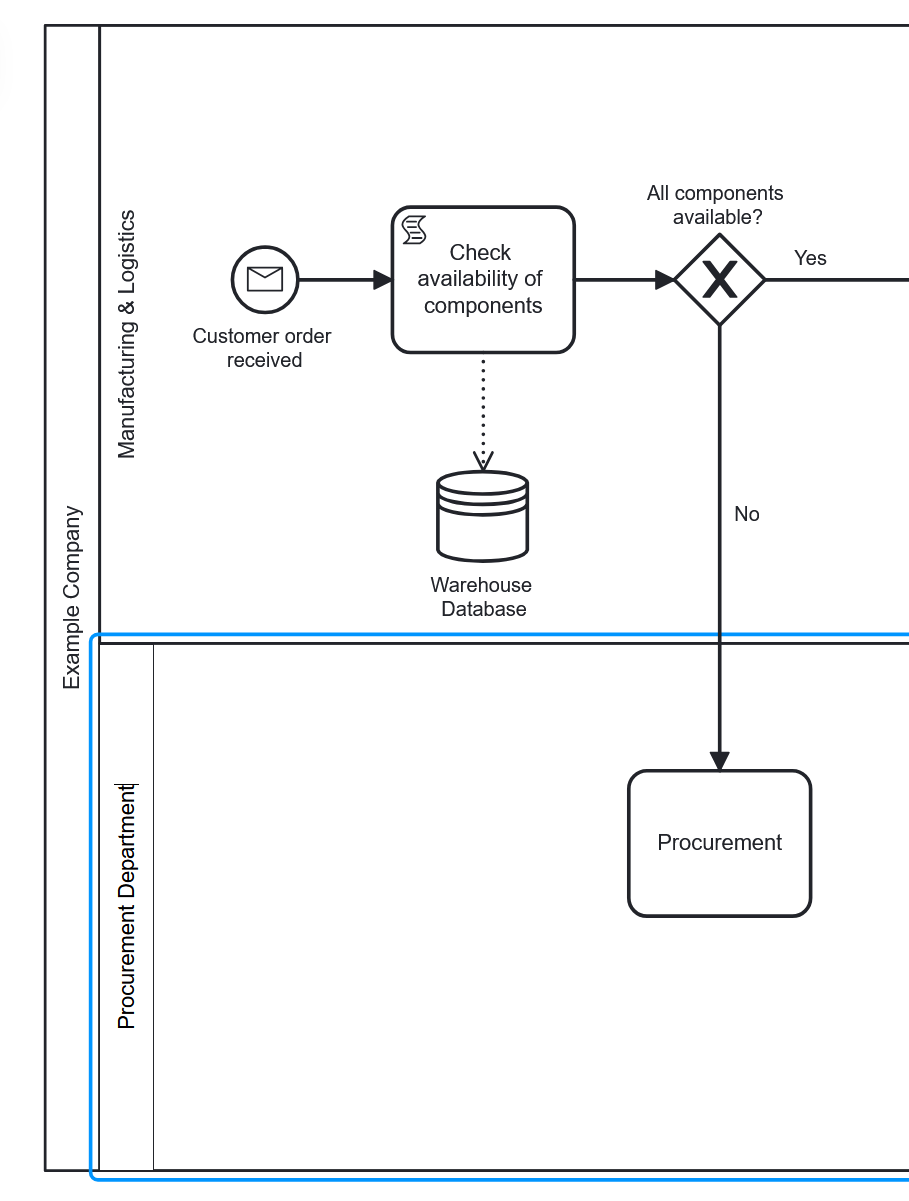
Pools + Participants
In the left-hand toolbar, you find the button for Create pool/participant. This allows us to divide the model
into different sections of different participants to further improve legibility of responsibilities.
Click it and onto your schema to encompass your entire current model in a pool and give it a company name by double-clicking
on the left side of the box.
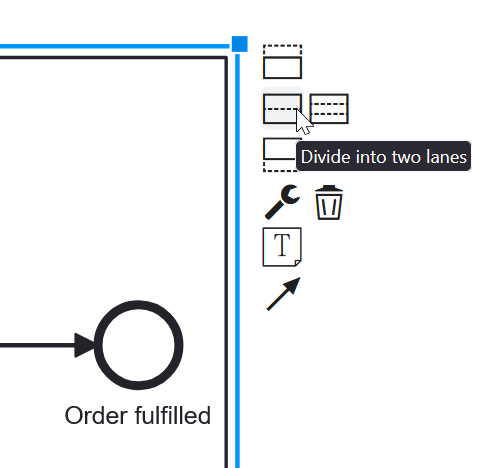
When selecting the entire pool you get some options in the top-right corner to further separate your schema into or
add additional sections. Click the Divide into two lanes option.
Note: When deleting a pool, you also delete its contents! But don’t worry, the undo-button in the top left corner
or pressing Ctrl or ⌘ + Z gives you back your work.
You now have a pool split into two groups of participants and can select each participant compartment separately.
Expand the bottom compartment to give you a bit more room. Double-clicking in the left-front of the compartment lets
you name it like you’ve done with elements. Name the particpants Manufacturing & Logistics and Procurement Department.
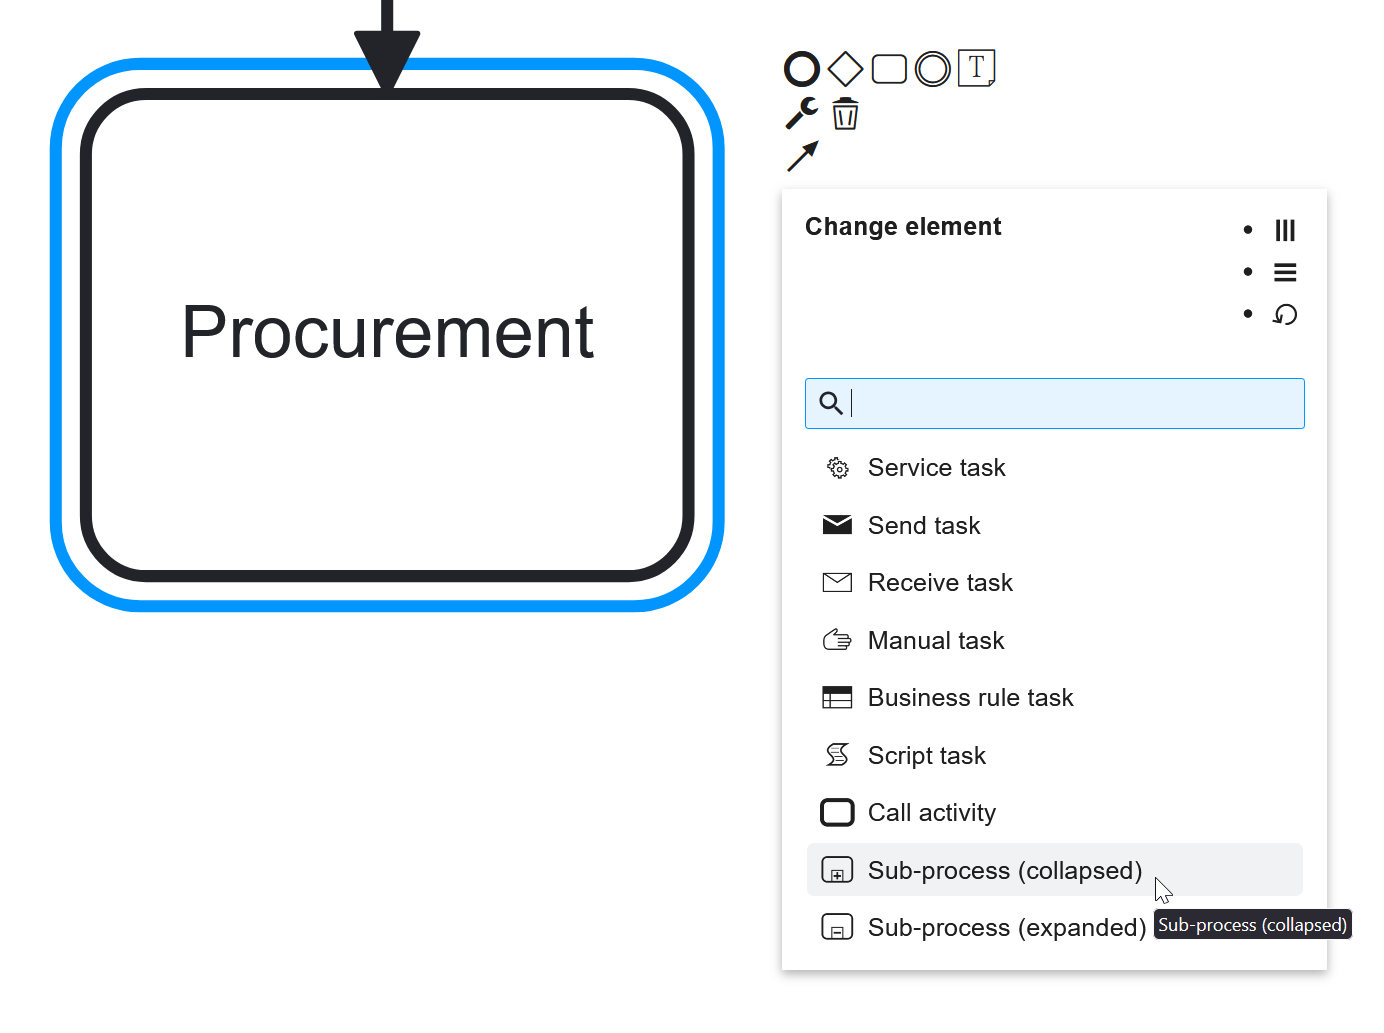
Sub-processes
Another type of task is a sub-process, meaning you can build an entire process inside one task element. You have the option
between a collapsed or expanded version, but for legibility we will go with the collapsed version here that is marked with a + inside of it.
You have two options to open a collapsed sub-process, either with the button on top of the page or with the arrow in the bottom right corner.
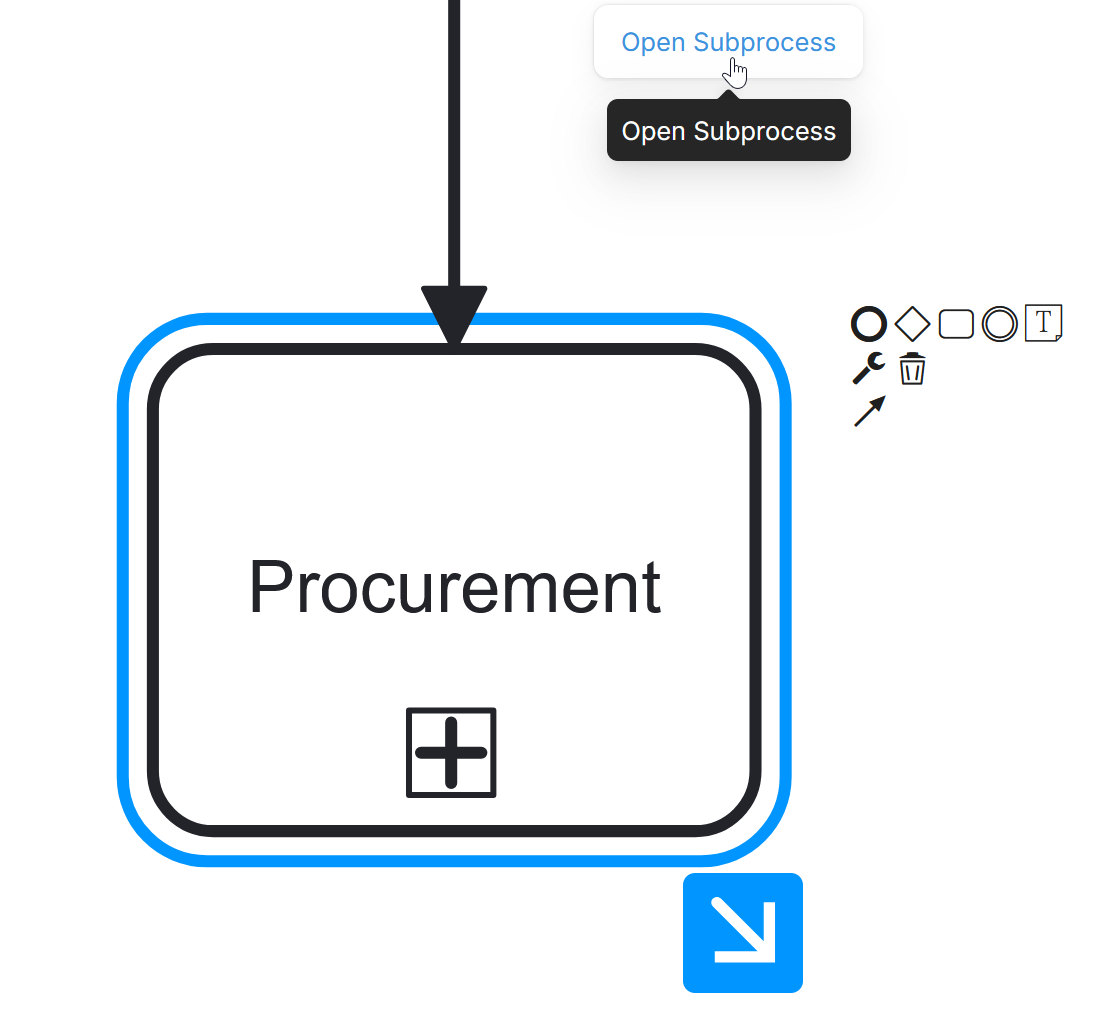
Now inside the sub-process you could freely build an entire new process. Of course Procurement would be a big and complicated process,
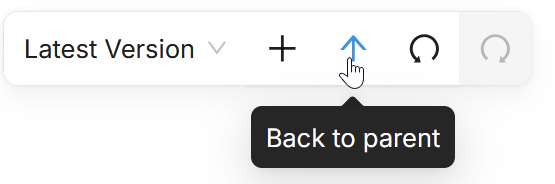
but for simplicity we will just leave this sub-process empty. You can navigate back to your model using the Back to parent button
in the top left corner.
Boundary events
One of the last things we want to demonstrate is something you might have been waiting for if you are familiar with BPMN already.
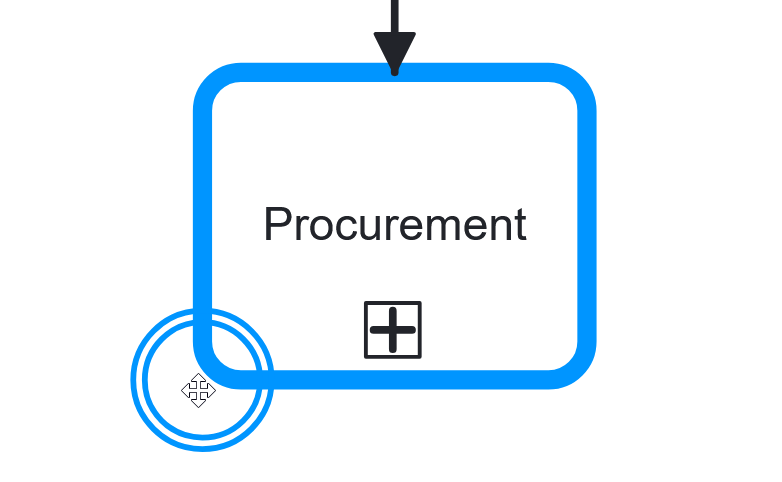
To create a boundary event, drag-and-drop an event from the left-side toolbar and attach it to an element, in our case the Procurement task.
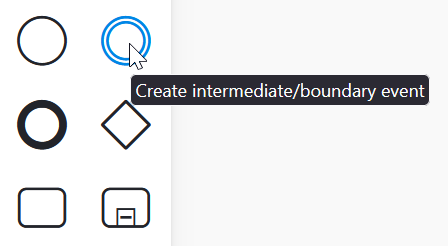
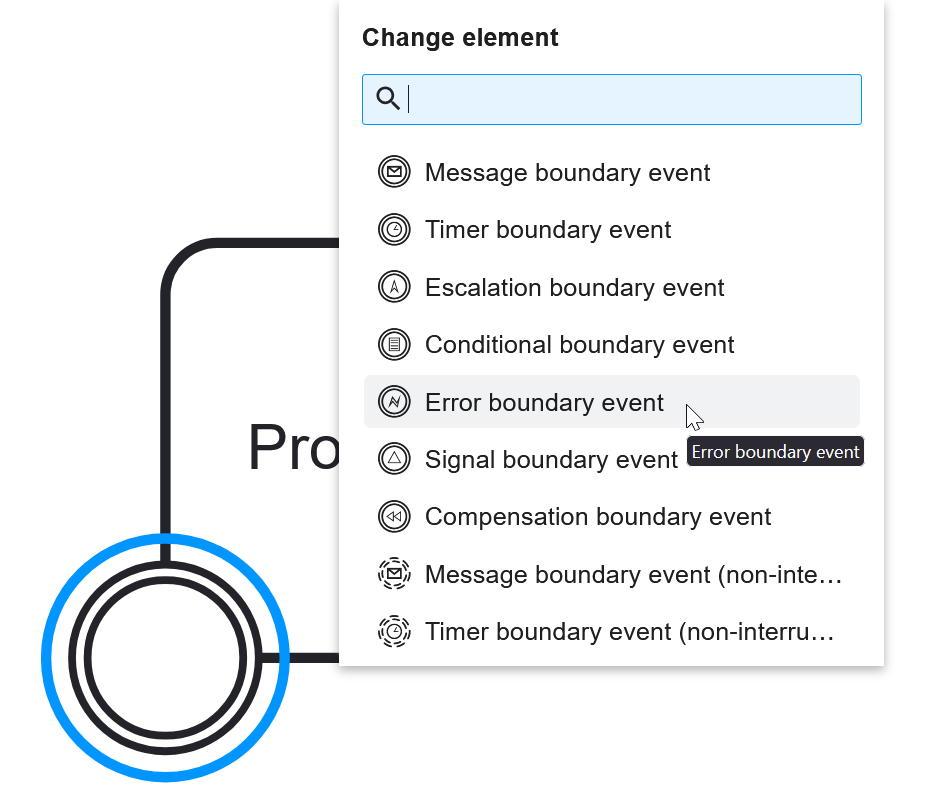
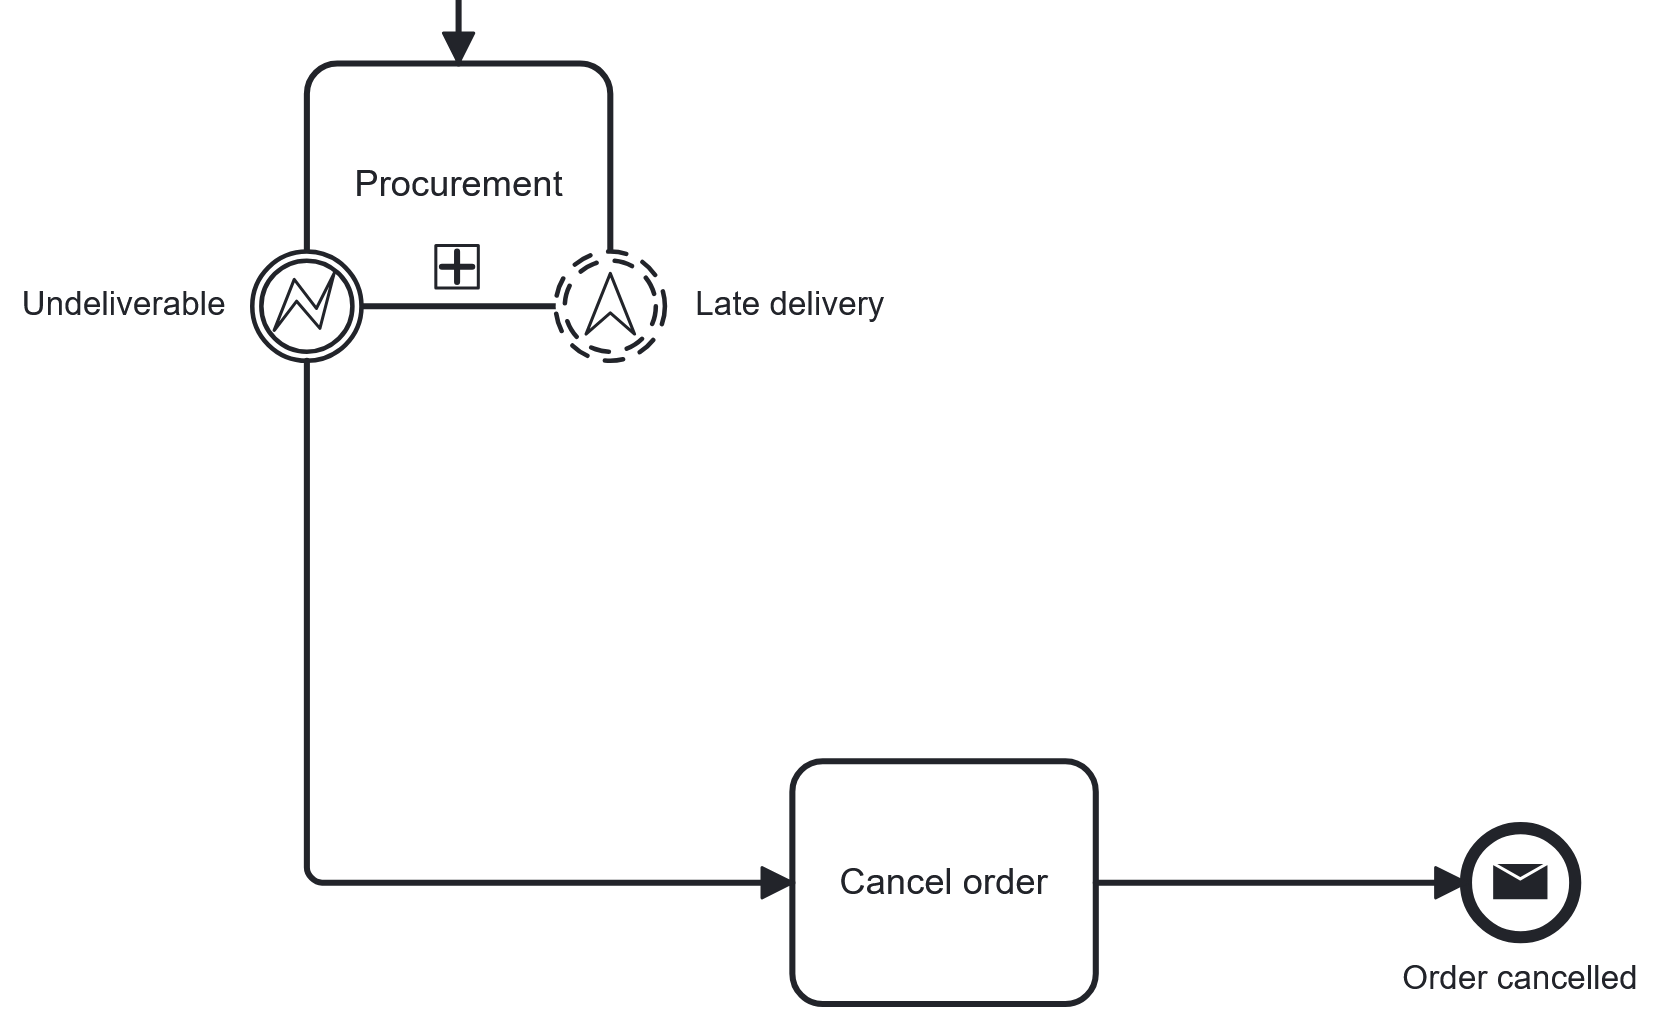
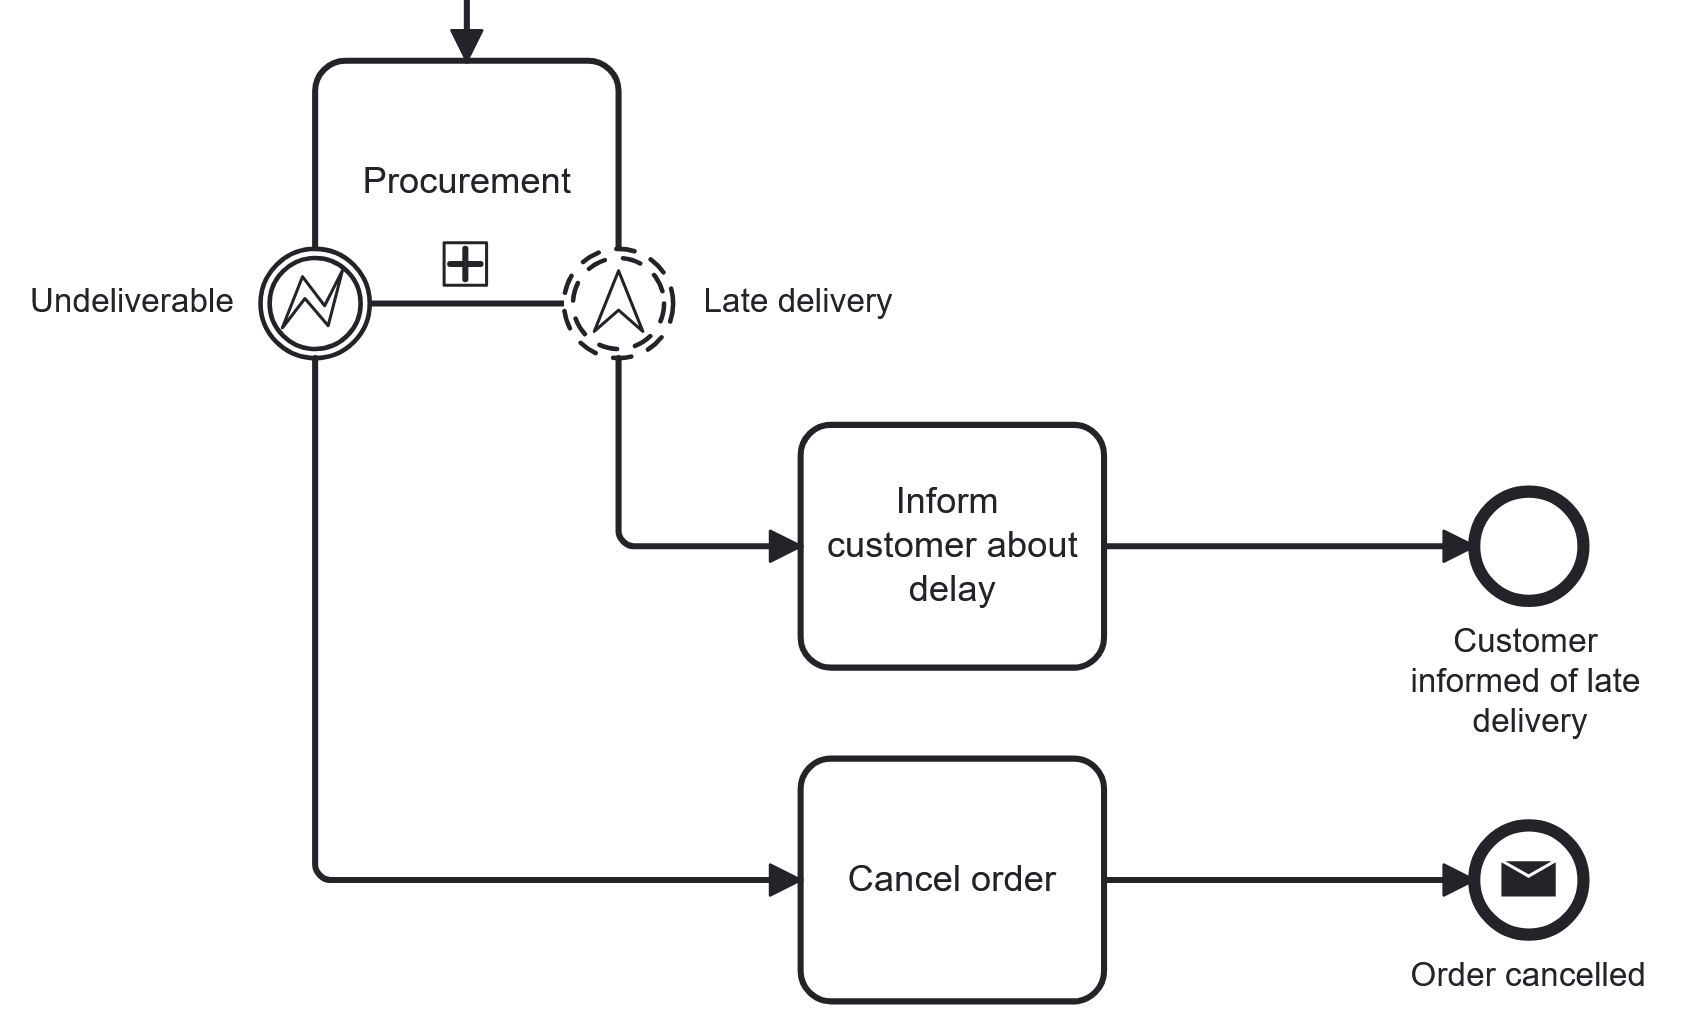
Using the wrench icon, change the event to an error boundary event. Name it Undeliverable.
Drag-and-drop another event to the Procurement task and change it to an escalation boundary event (non-interrupting).
Name it Late Delivery.
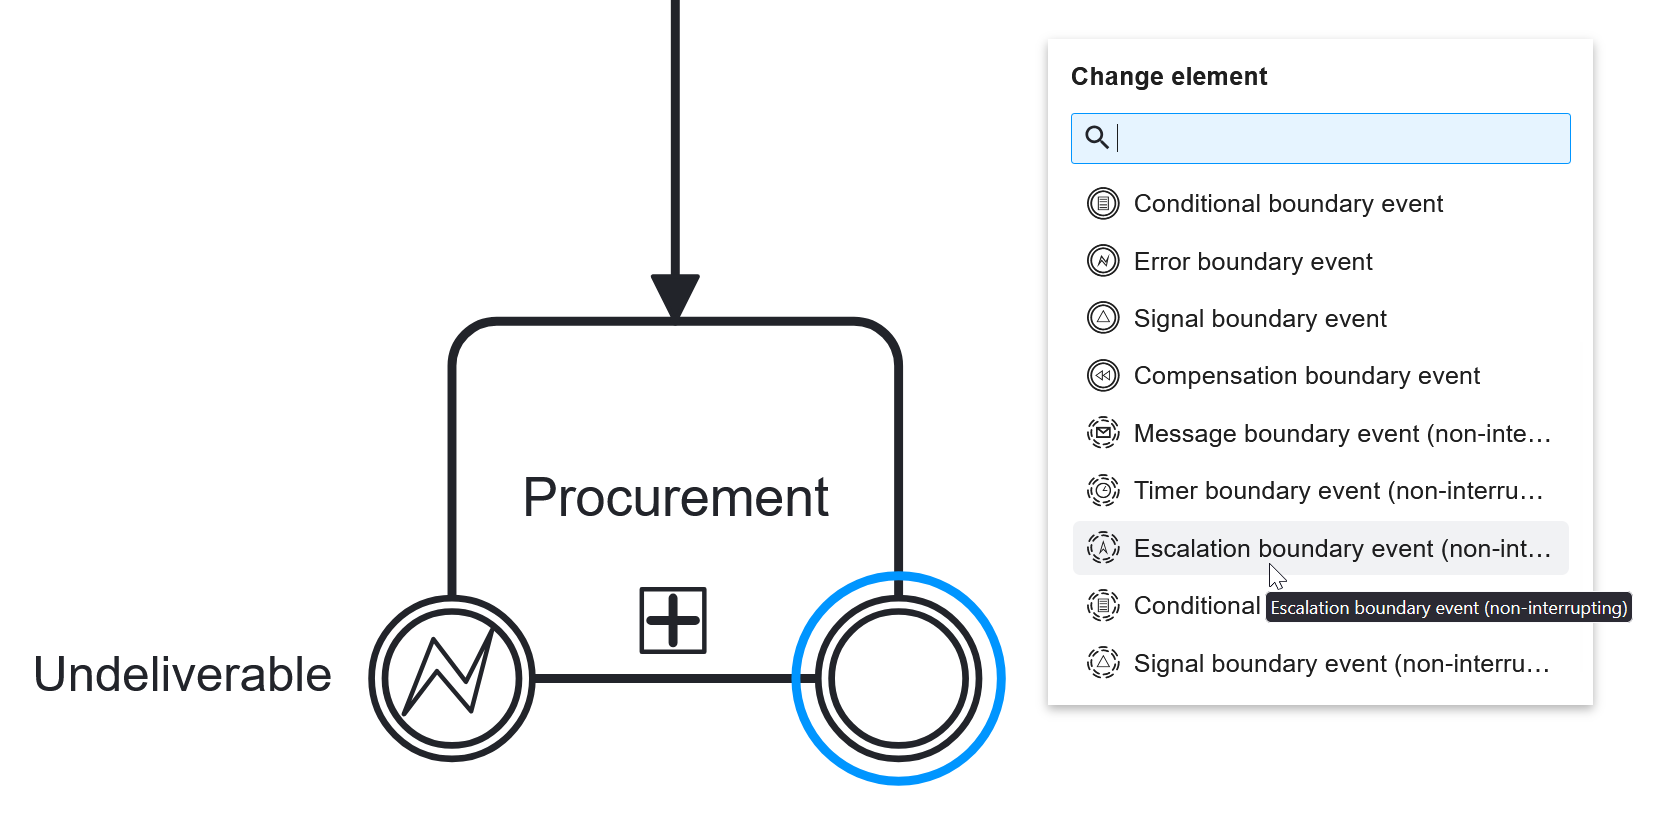
If the Procurement (sub-)process cannot resolve the issue of the missing components, this boundary error event would be
triggered, which is why we called it Undeliverable. This being an interrupting event, as indicated by the solid lines,
defines that the process ends here. After cancelling the order the process ends in a message end event
called Order cancelled, informing the customer.
The Late Delivery event is a non-interrupting event, meaning the main flow of the process does not have to go through
this path if this event is triggered. The Procurement (sub-)process can keep running, trying to acquire the missing components,
and at some point triggers this event to inform the customer about the delayed delivery. The flow from this event
to notify the customer also needs to stop somewhere, so it ends in an end event called Customer informed of late delivery.
Finishing the diagram
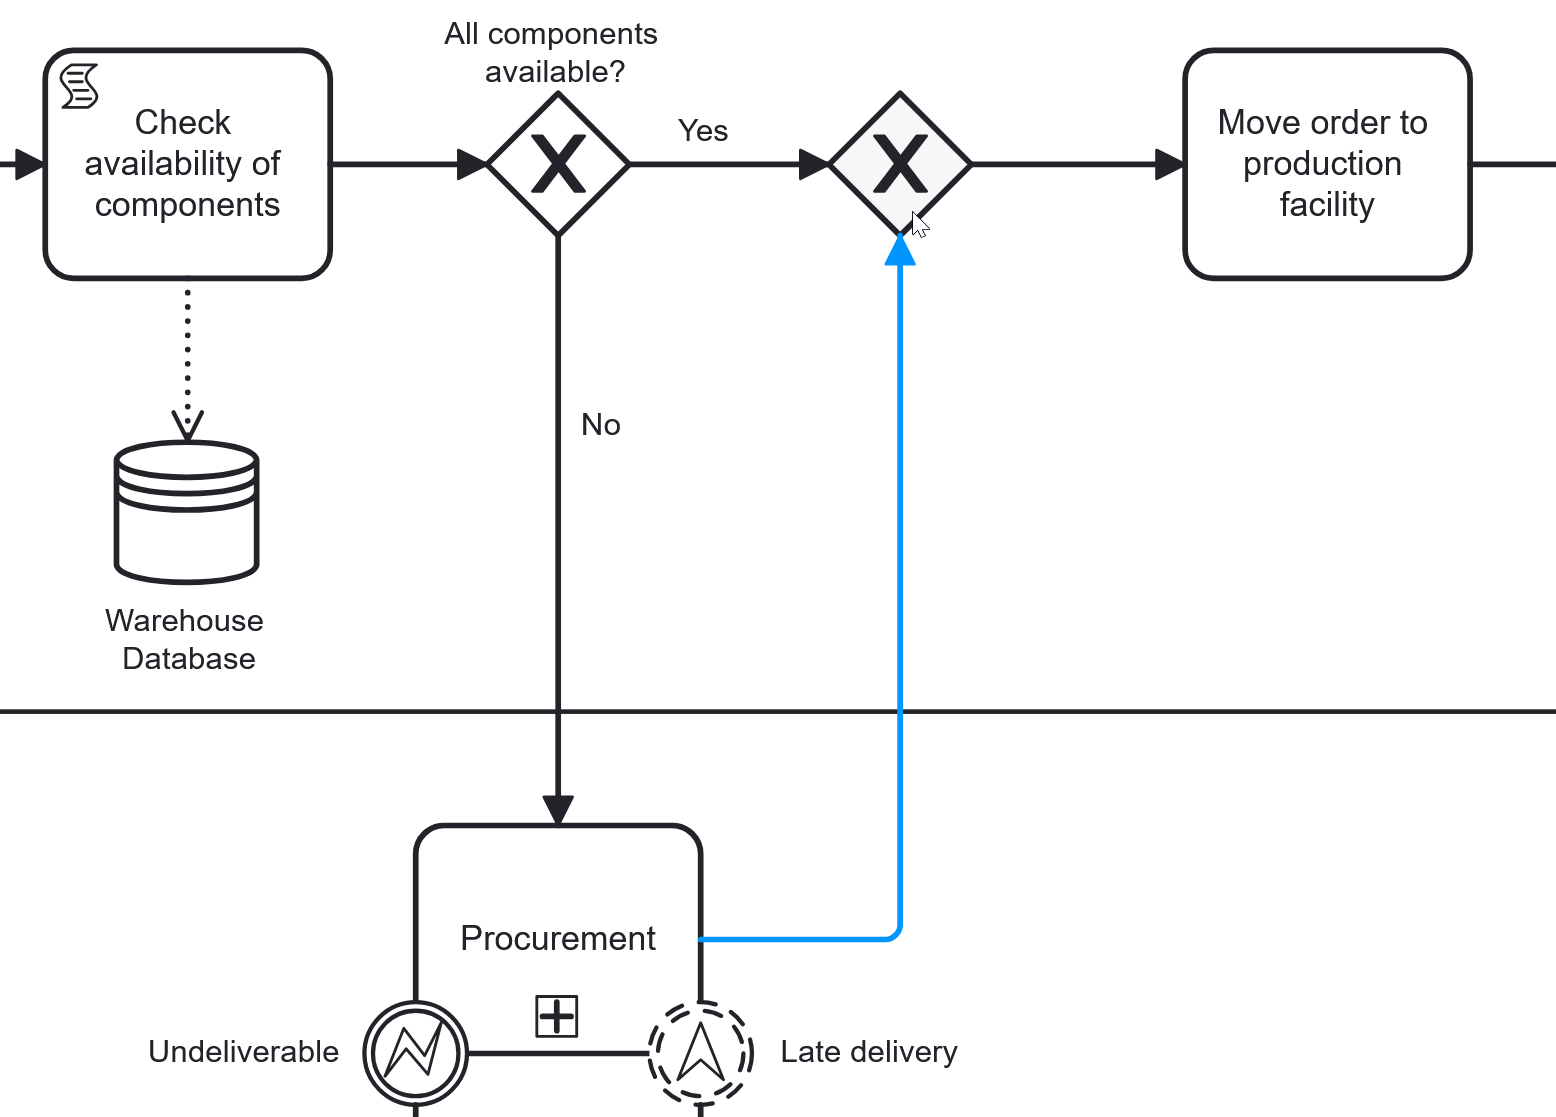
If the Procurement process is (eventually) successful, the order can be fulfilled, meaning the flow returns to the
Manufacturing & Logistics department. To not miss any steps, the flow has to continue right after the All components available? gate.
To achieve this, one uses an XOR gateway to merge two incoming flows. Simply drag one from the left-side toolbar onto the Yes arrow.
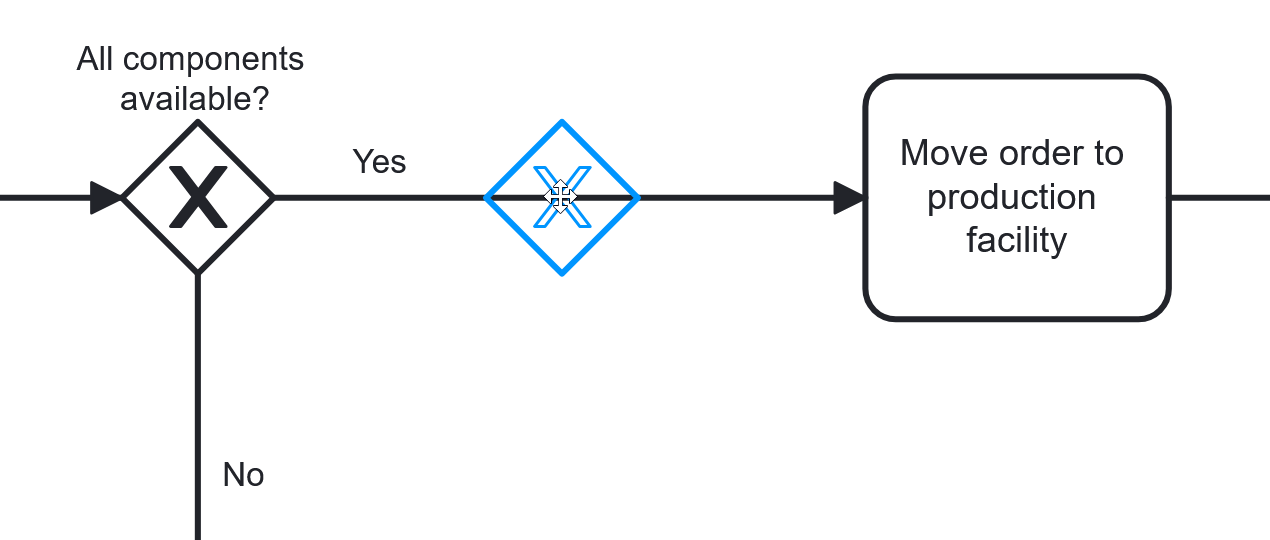
Once the Procurement process is finished gathering the missing components, without triggering the Undeliverable event
and potentially after triggering the Late Delivery event, the order can now move to a production facility.
You can now link Procurement directly to the newly added XOR gateway to merge two incoming flows and your simplified order fulfillment diagram is complete.
This concludes our process creation tutorial for the BPMN editor of PROCEED. You have now used most tools of
the editor UI, built a reasonable process according to BPMN standards and are ready to create your own models.
Enjoy using our tools and thank you for using PROCEED!
