Create, Manage, and Delete Processes
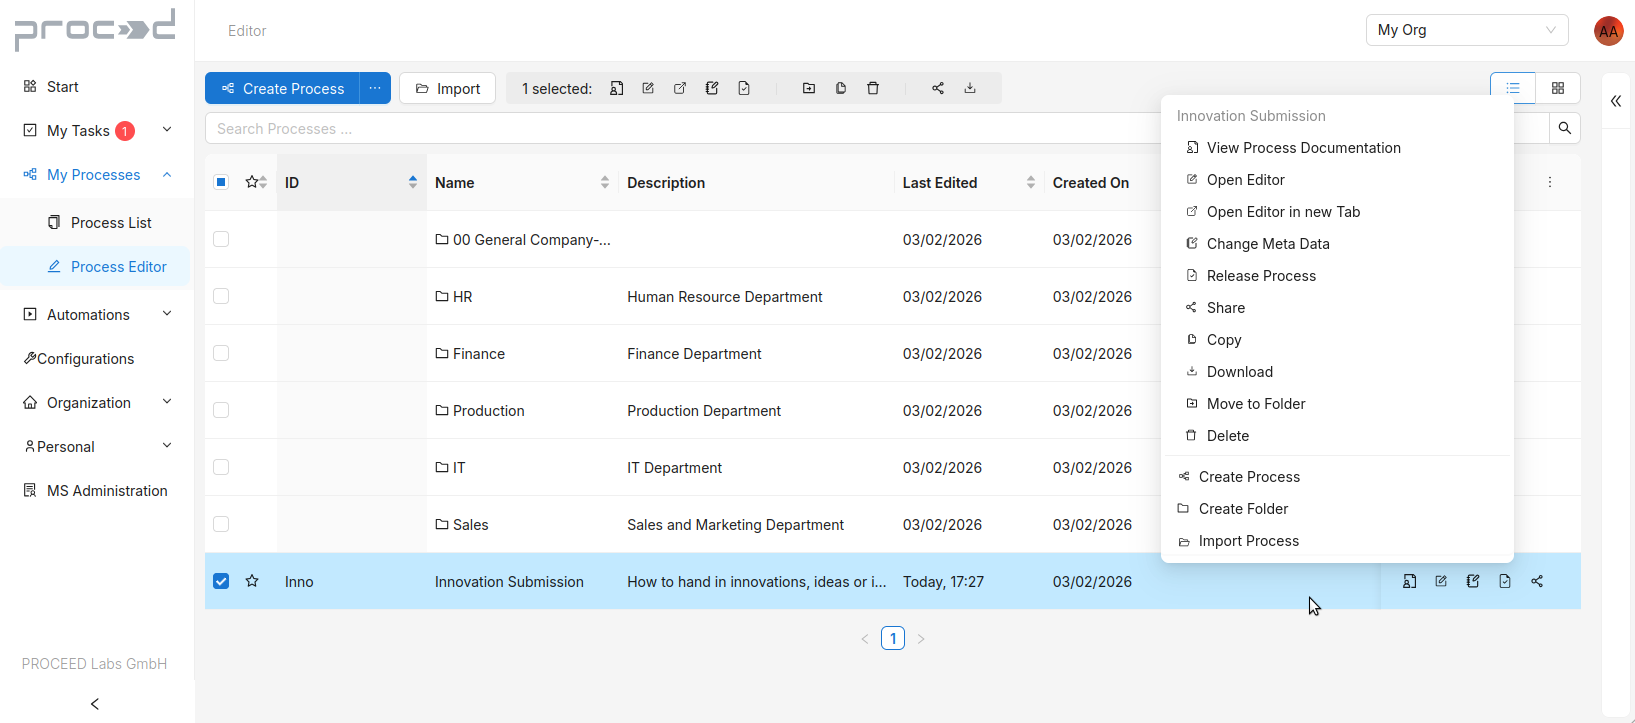
When opening the Process Editor view, you see an table. Here, you can create Folders and Process for your company space. The following screenshot shows the available menu options if you select, hover, or right-click a table row:
Add a new Process or Folder
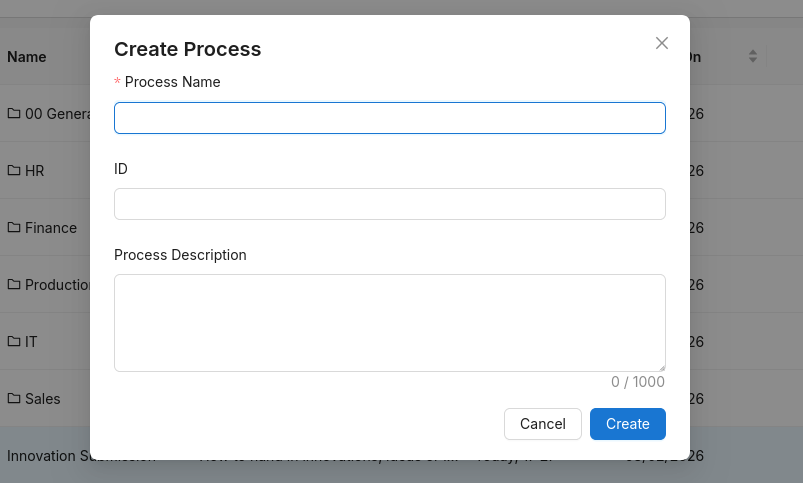
By right-clicking in the table or by clicking on the Create Process button at the top left, you can add a new process and a window will open. There, a process Name is required. Optionally, you can add a ID and Description. After adding a Name it will be possible to press the Create button to create a new process.
This is similar to adding new Folders: you can either right-click or use the three dot drop-down button in the top left.
Importing existing Processes
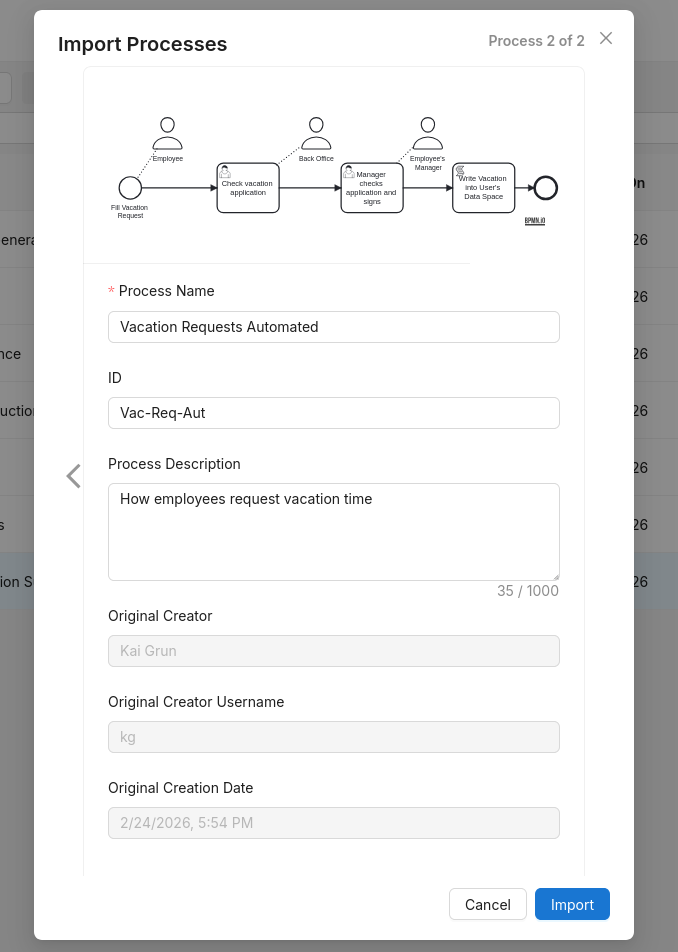
You can also import existing processes from your local hard drive by right-clicking or with the Import button. After selecting the process file, a window shows the process meta information that can be changed for import.
Organize Processes
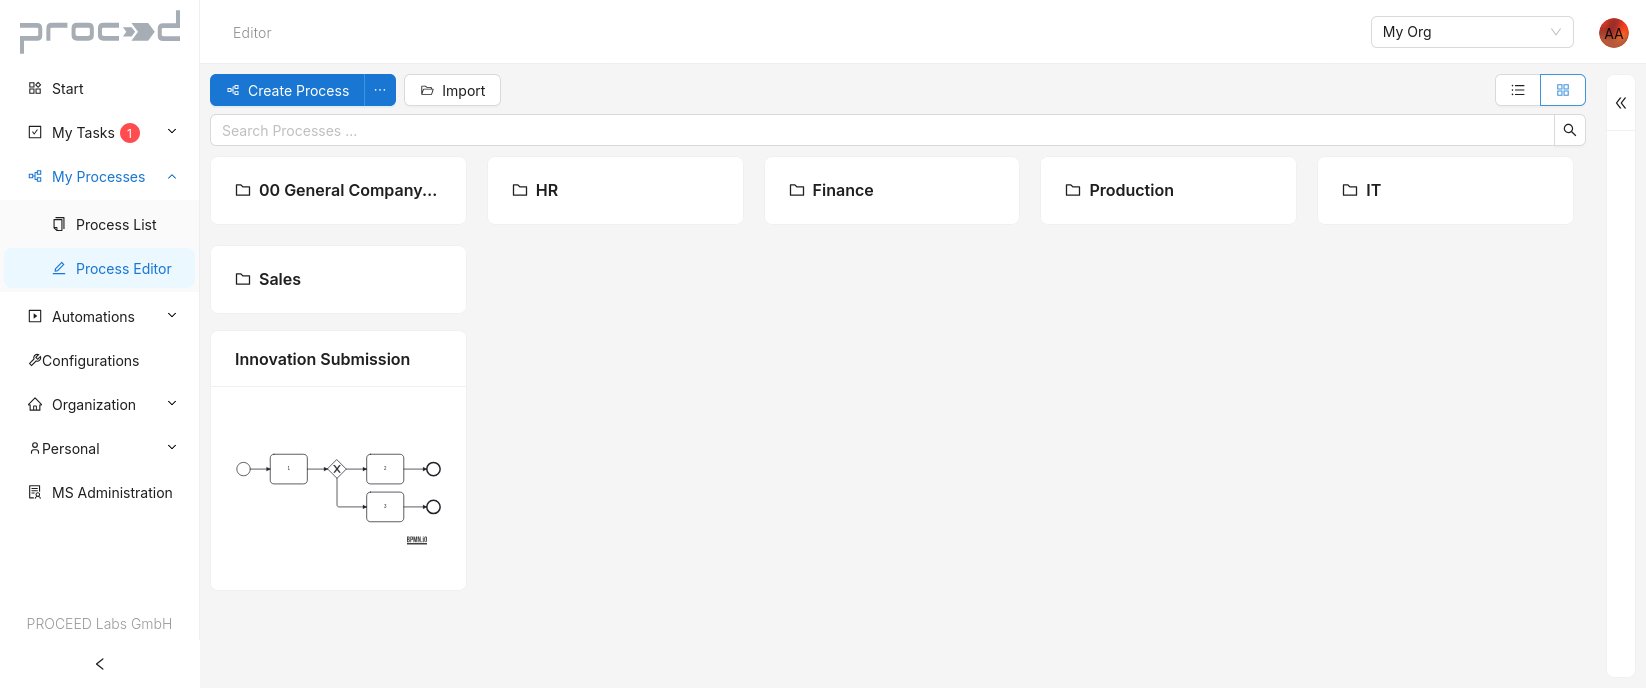
Like the Process List view, the Process Editor page gives you two ways to view your folders and processes: as a table with rows or as cards. This can be changed by clicking on the two icons at the top right.
The table view is more versatile. There, you can mark your favorite processes with a star, filter processes using the search bar, or sort processes by columns. You can also select one or more processes in the left column, right-click or hover your mouse over a row. New icons will then appear at the top and right of the row, which you can use to View the Process Documentation, Open the Process Editor, Change the Meta Data, Move, Release, Download and Share processes.
Clicking on a row opens the Folder or the Process Editor to design and change a process.